
Item Documentation
BicyCart
Single Vendor eCommerce Flutter App Template
Thank you for purchasing BicyCart. If you have a question this guide does not answer, reach out through the item support tab on CodeCanyon or the contact details in Support.
01 Introduction
BicyCart is a complete front-end template for a single-vendor online store, built with Flutter. The sample content is a bicycle shop, but every screen works for any catalogue: fashion, electronics, furniture or groceries. It covers the whole shopping journey, from onboarding and sign-in through browsing, cart, checkout and payment, to order tracking, returns, invoices and support.
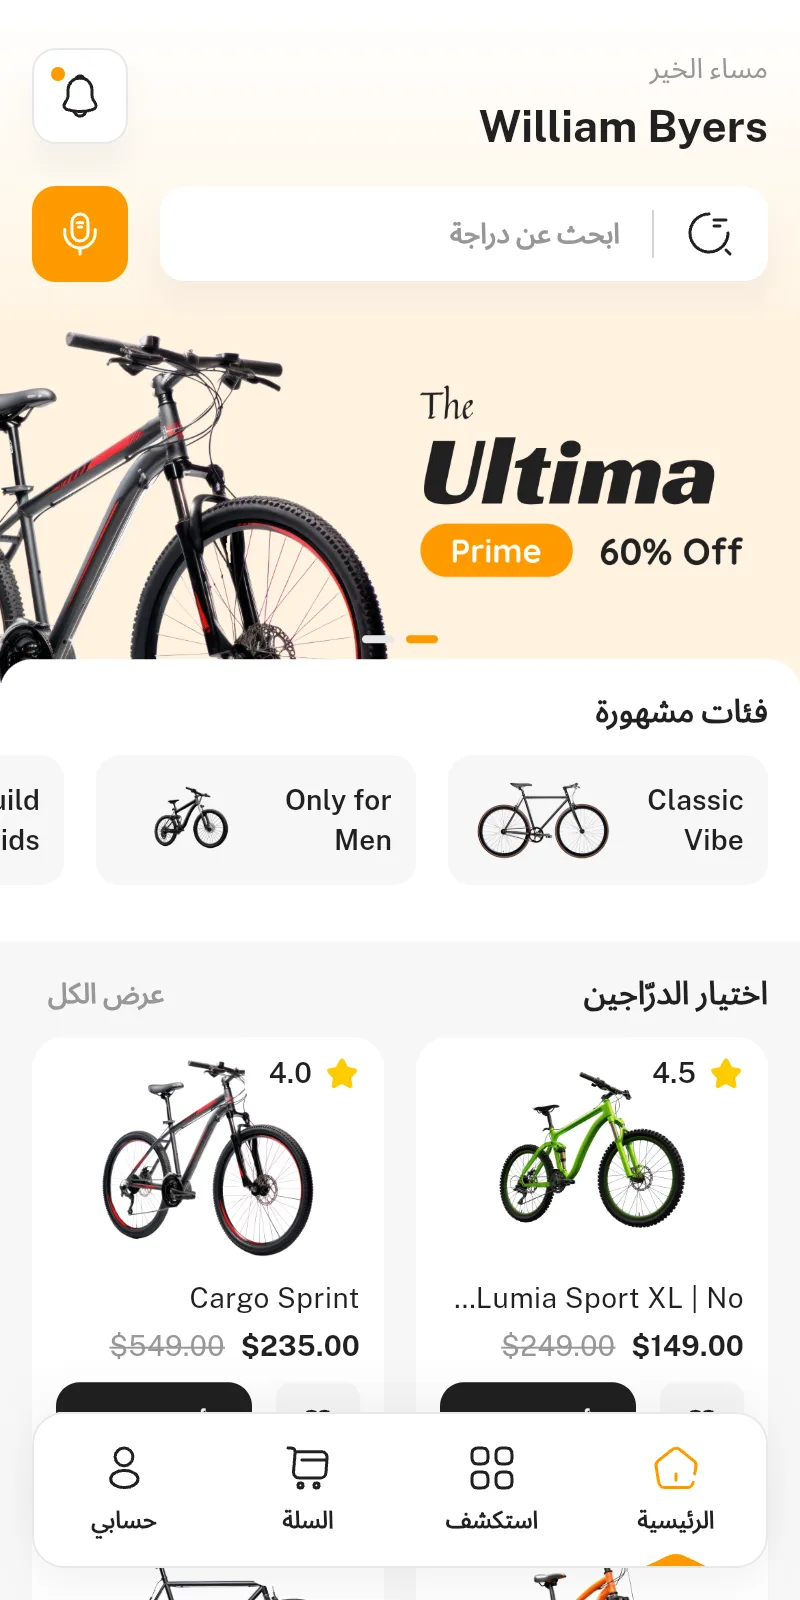
Every screen is designed for light and dark mode, English and Arabic (right-to-left), and phones and tablets.
This guide walks you through installing the project, running it, and customising every part of it. It assumes no prior Flutter experience. If you have built a Flutter app before, skip ahead to Project Structure.
BicyCart is a UI template. It does not include a backend, admin panel, database or payment gateway. Every screen is powered by local demo data, with a short simulated network delay, so you can explore the whole app immediately. Connecting a Real API explains how to replace that demo data with your own.
The template runs as delivered without any third-party accounts or API keys: payments, Google sign-in, OTP, voice search and live chat are simulated with demo data. To make them work for real you must connect your own services, for example a payment gateway (Stripe, Razorpay, PayPal), Firebase Authentication or another SMS/OTP provider, Google Sign-In, a speech-to-text service and a chat backend. These services are not included, require your own accounts and API keys, and may charge usage fees billed to you by their providers. You are responsible for obtaining those keys and for any costs they incur.
02 What’s Included
After extracting the download you will find:
| Folder | Description |
|---|---|
BicyCart-Flutter-Source/ | The complete Flutter project. This is the folder you open in your editor. |
Figma/ | The Figma design file containing every screen, component and design token. |
Documentation/ | An offline copy of this documentation. Open index.html in any browser. |
Inside the Flutter project:
03 Features
- Onboarding and sign-in: splash, three-slide onboarding, login, create account, OTP verification, complete profile, forgot and reset password, Google sign-in button and guest mode.
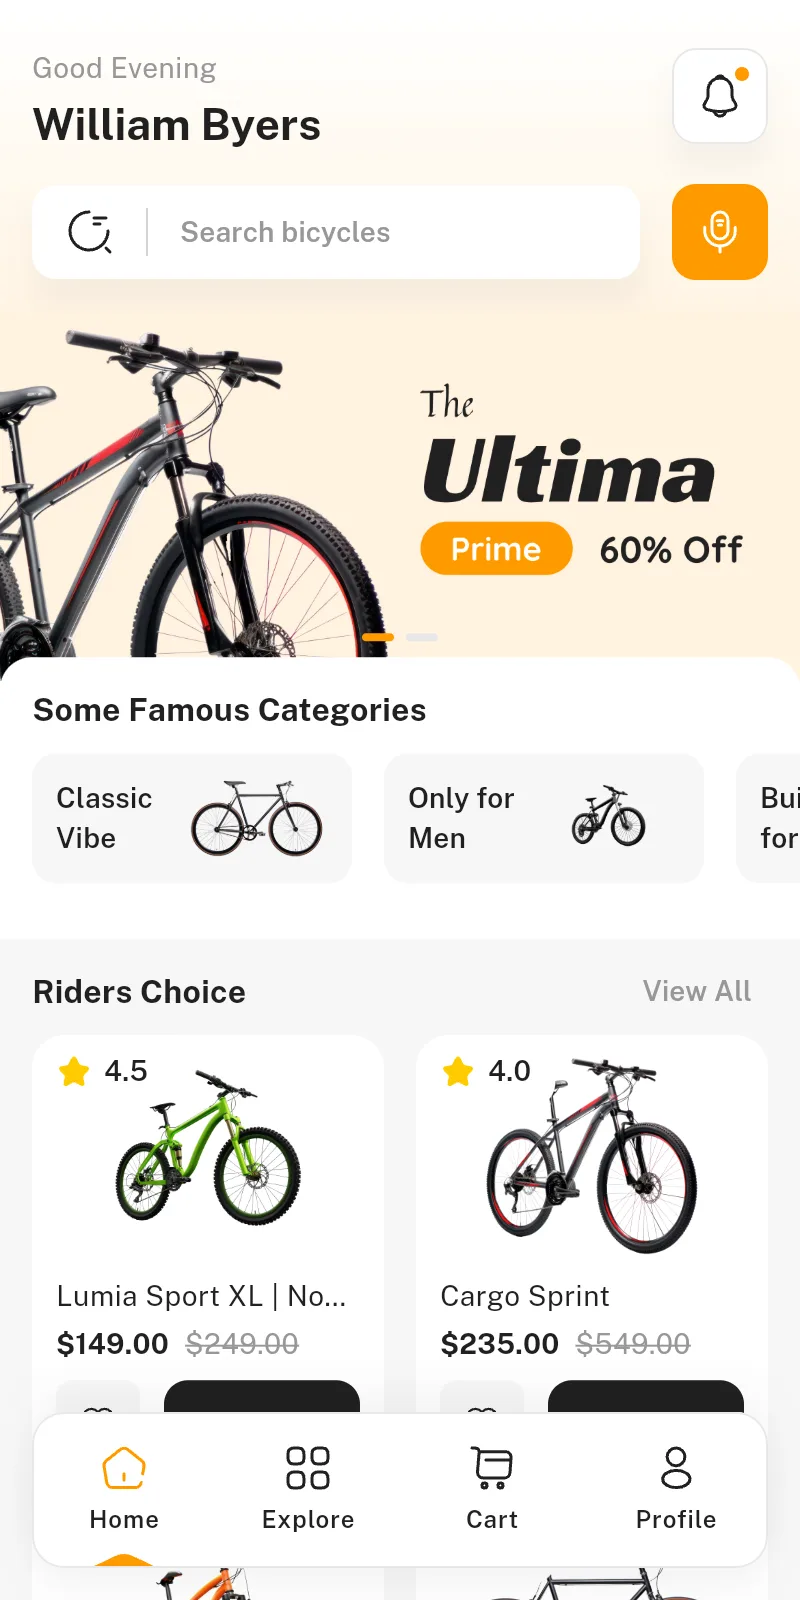
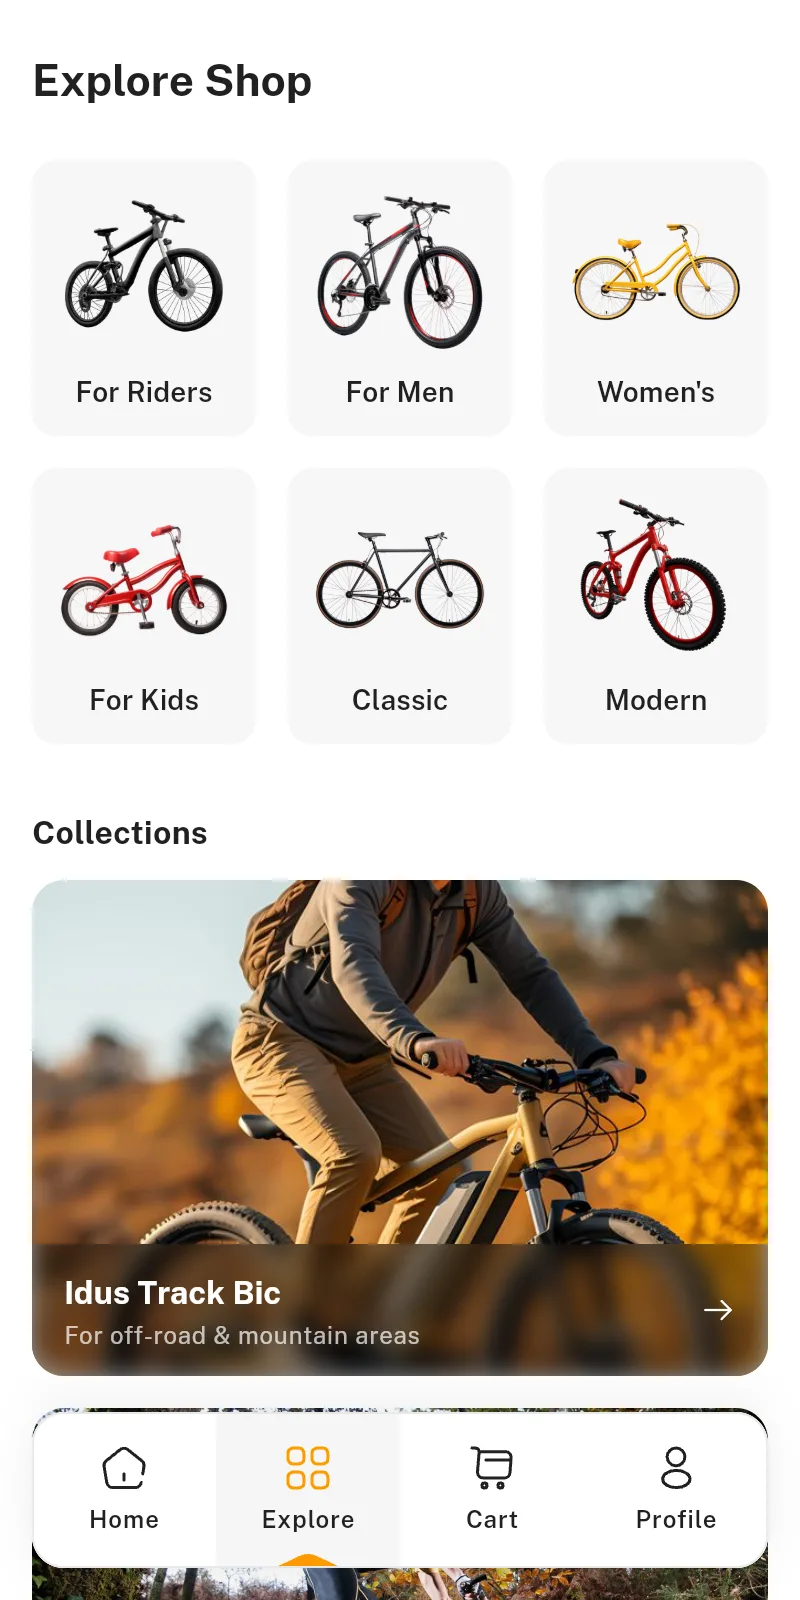
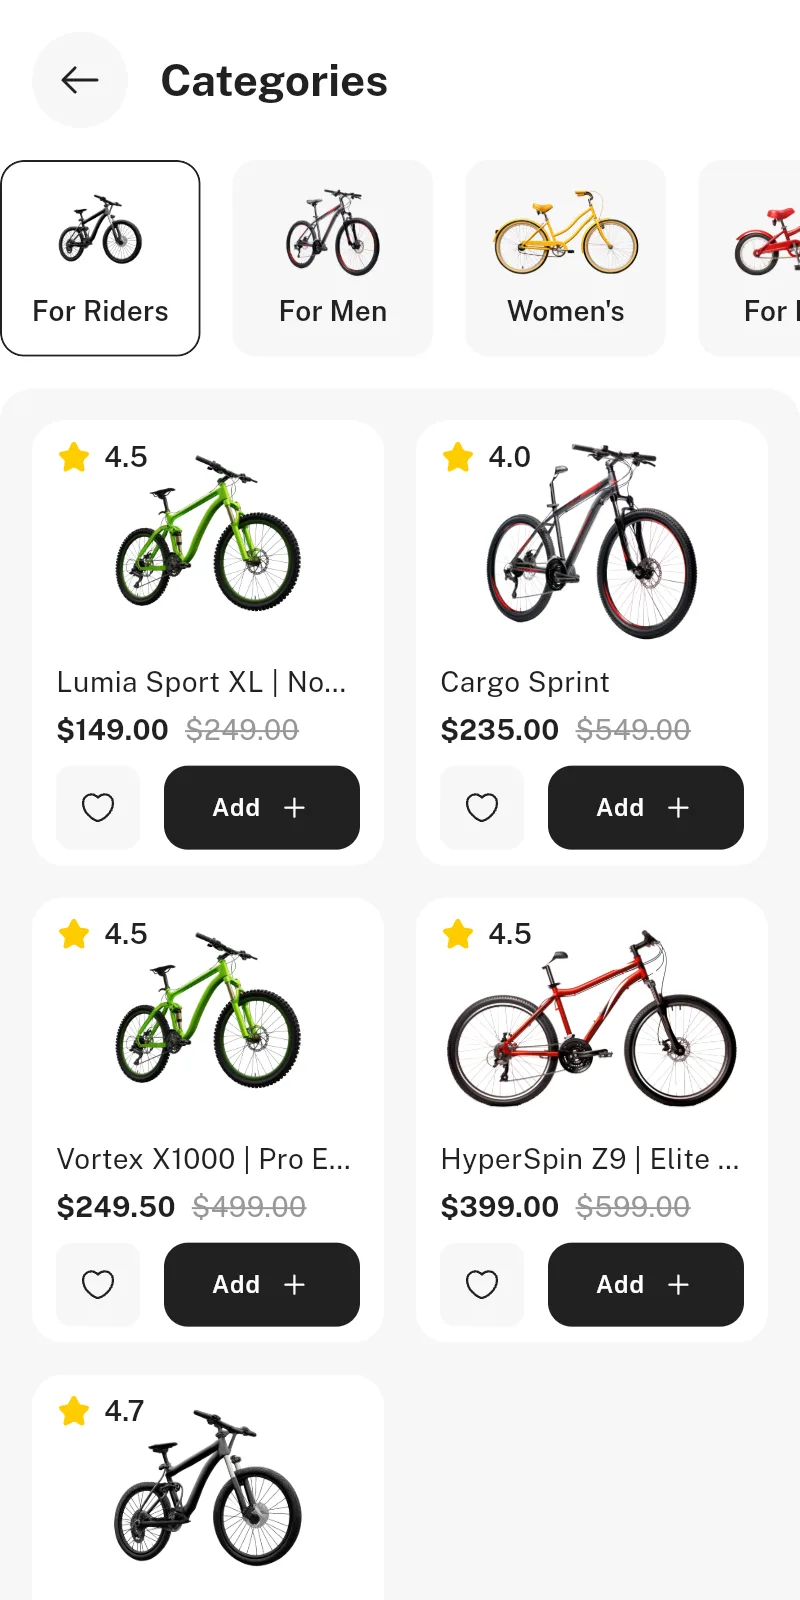
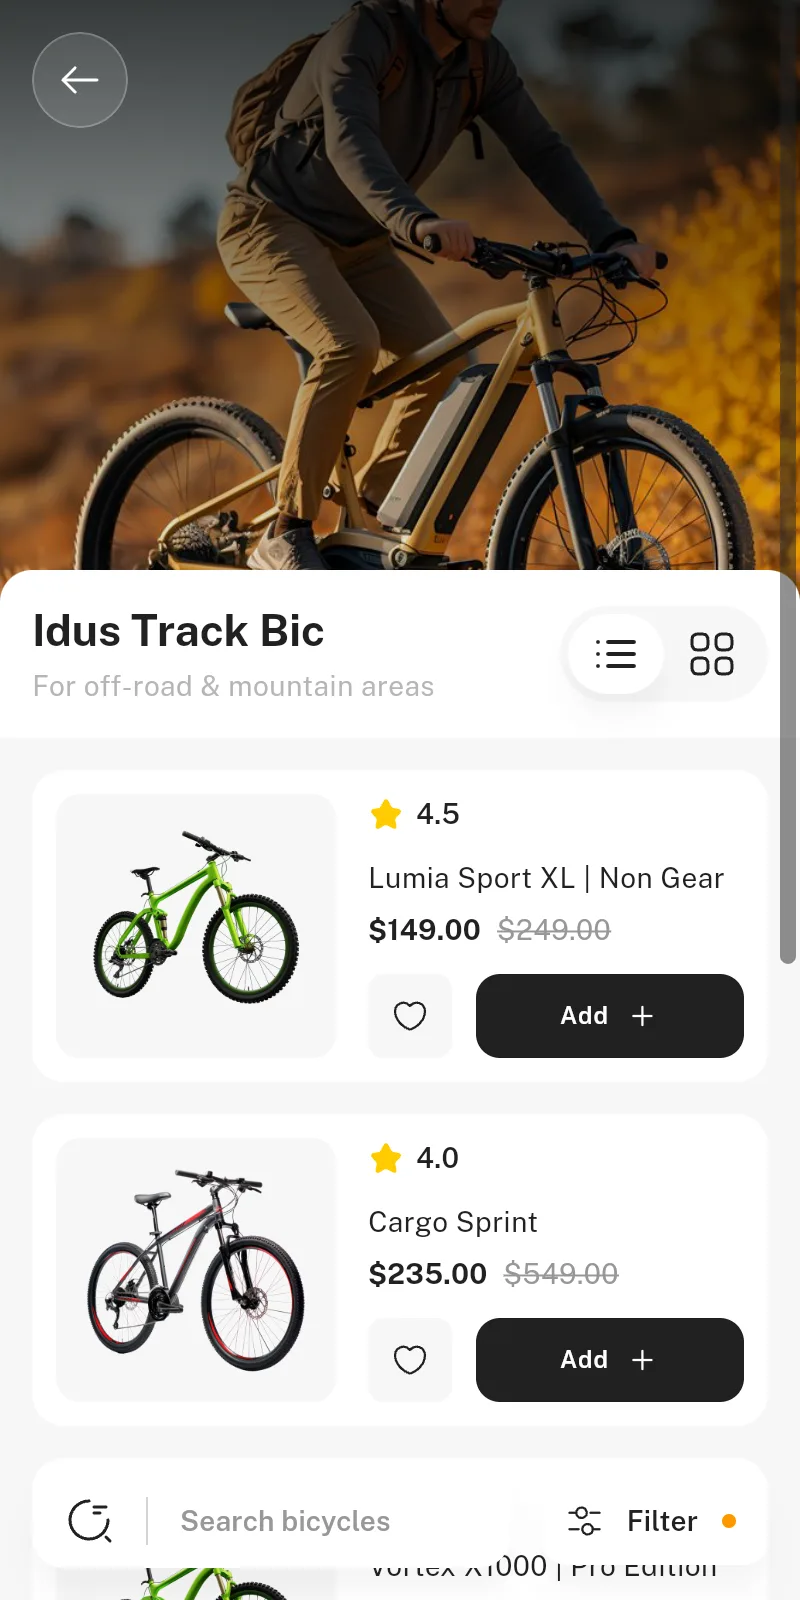
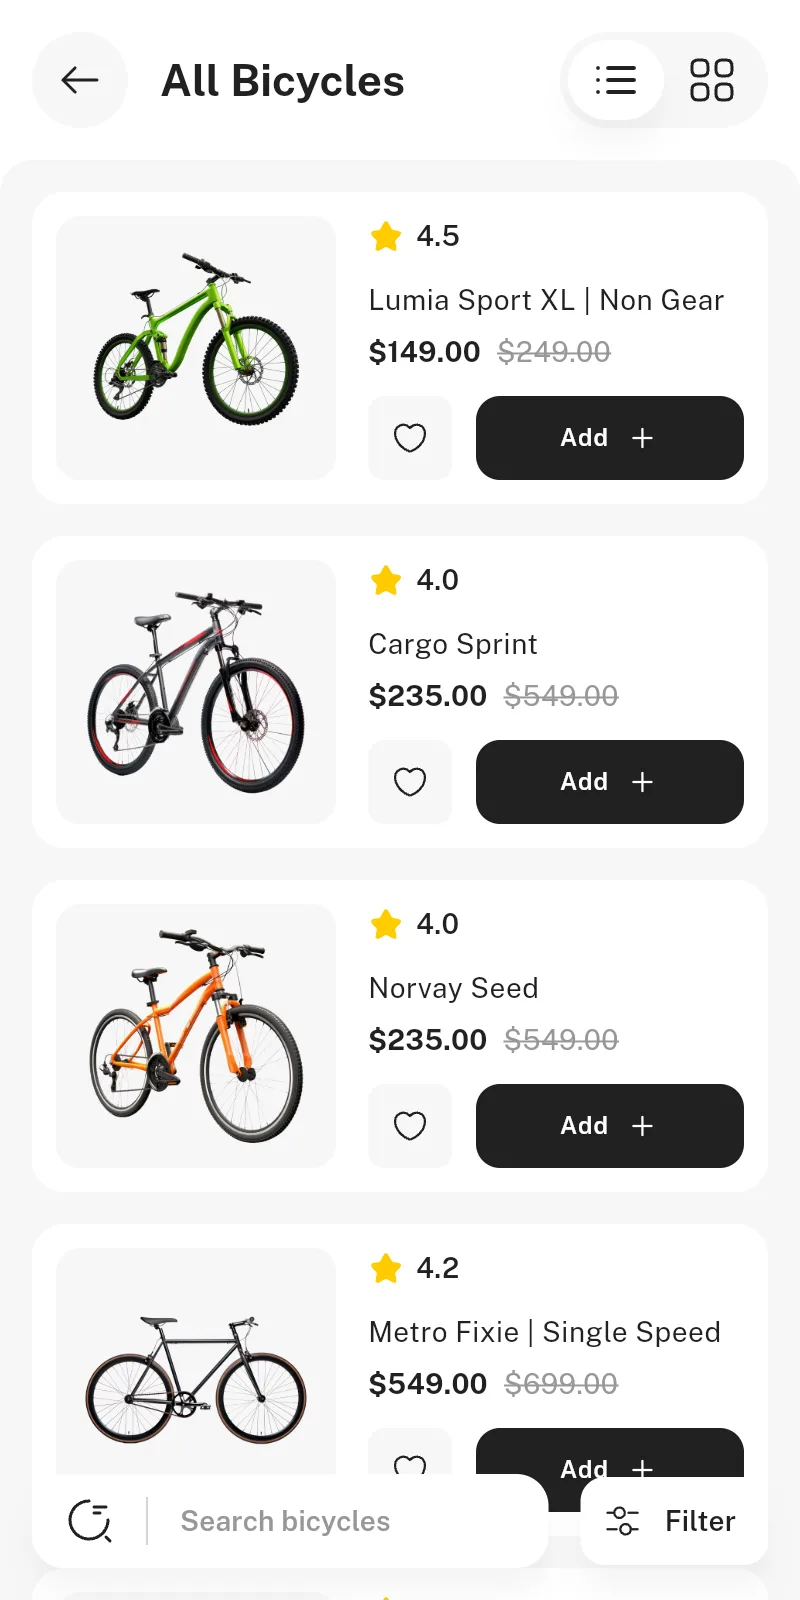
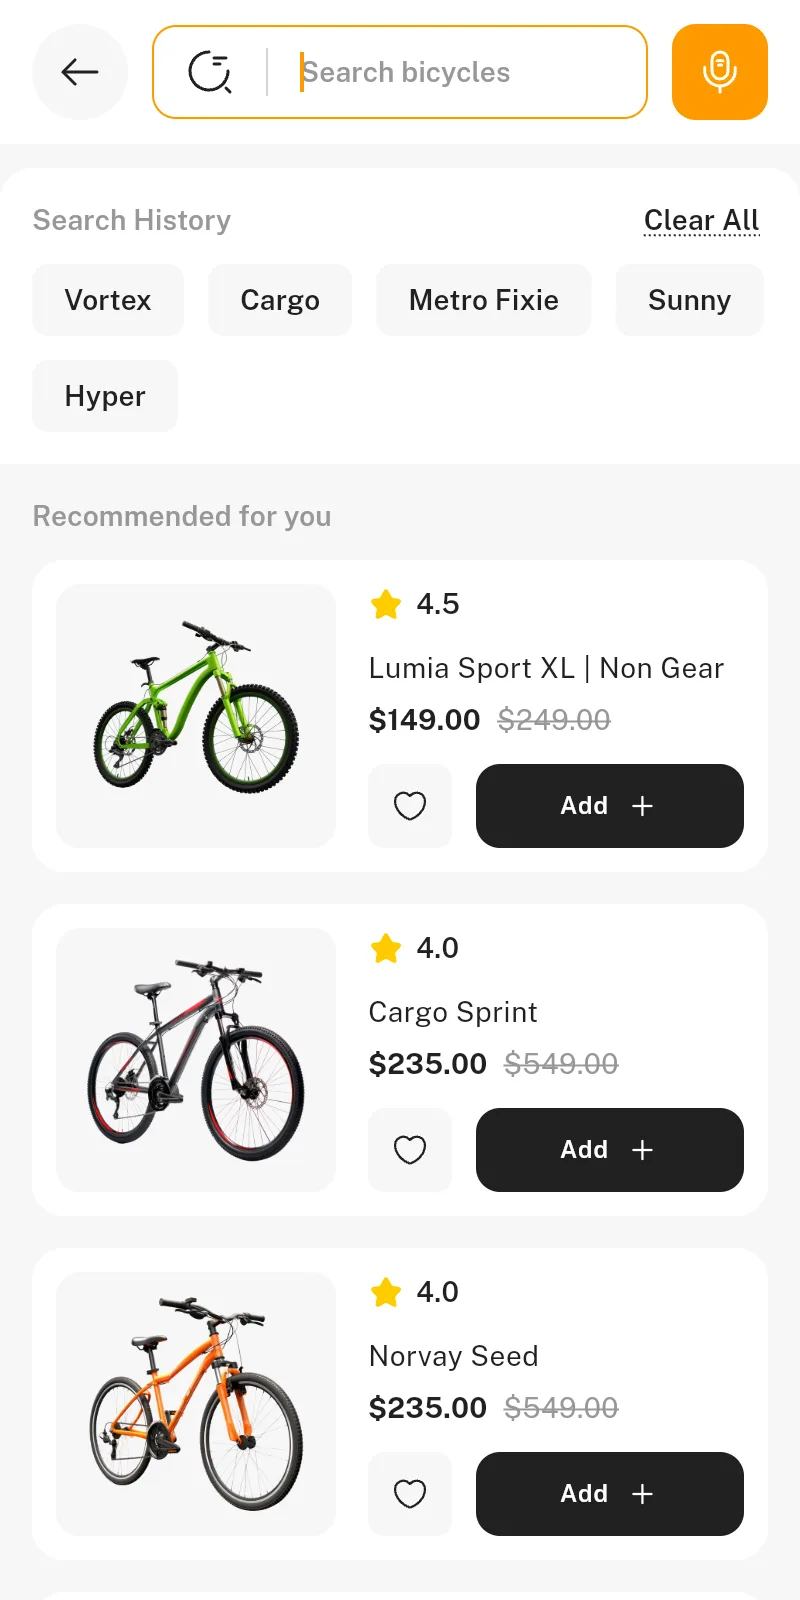
- Shopping: home with a banner slider, categories and collections; Explore tab; category browser; product listing with search, sort, filters and grid or list layout; global search with history and voice search.
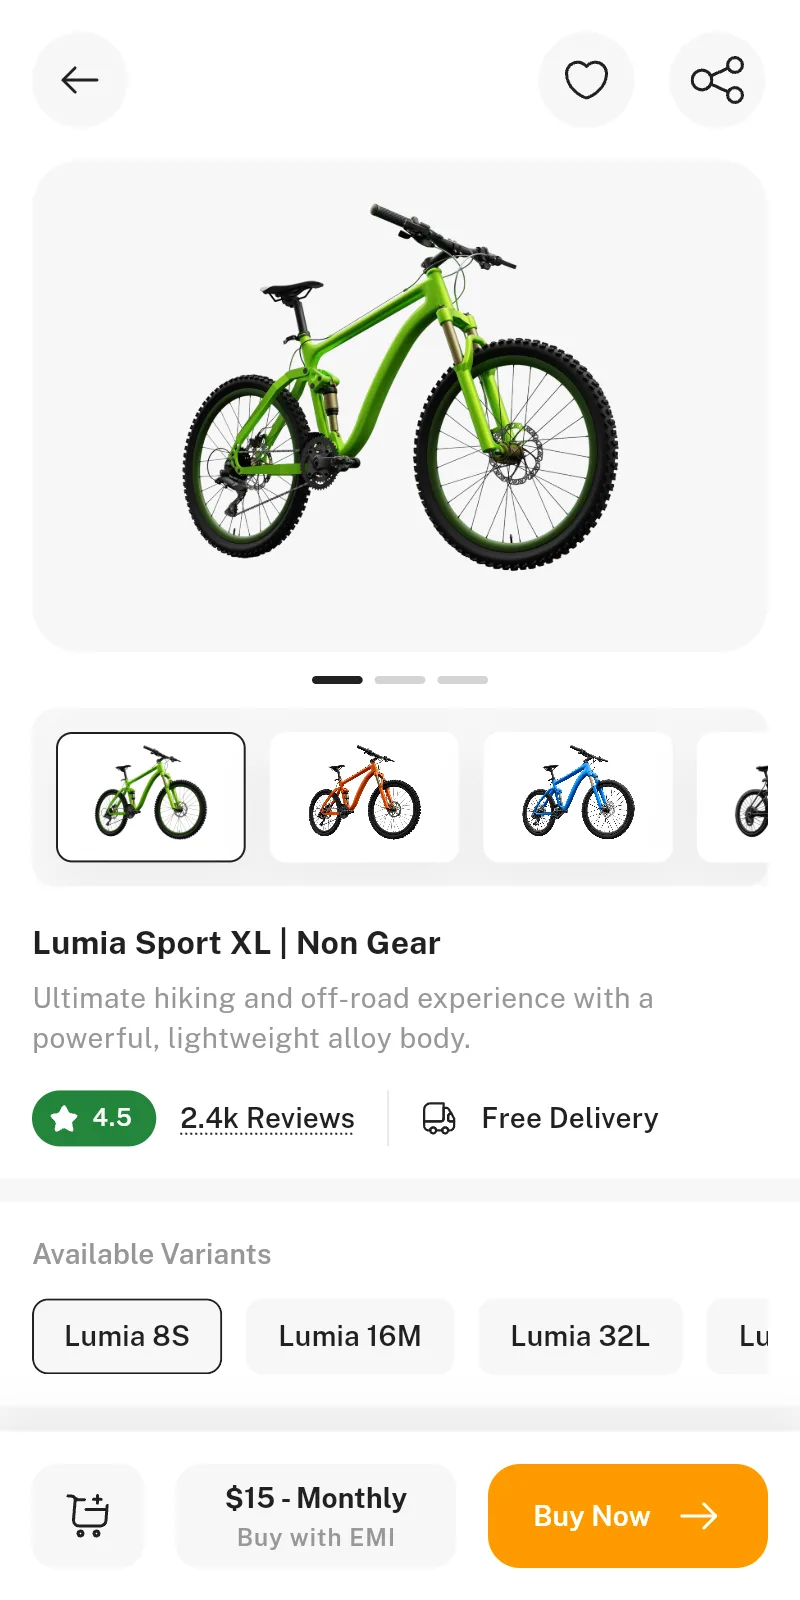
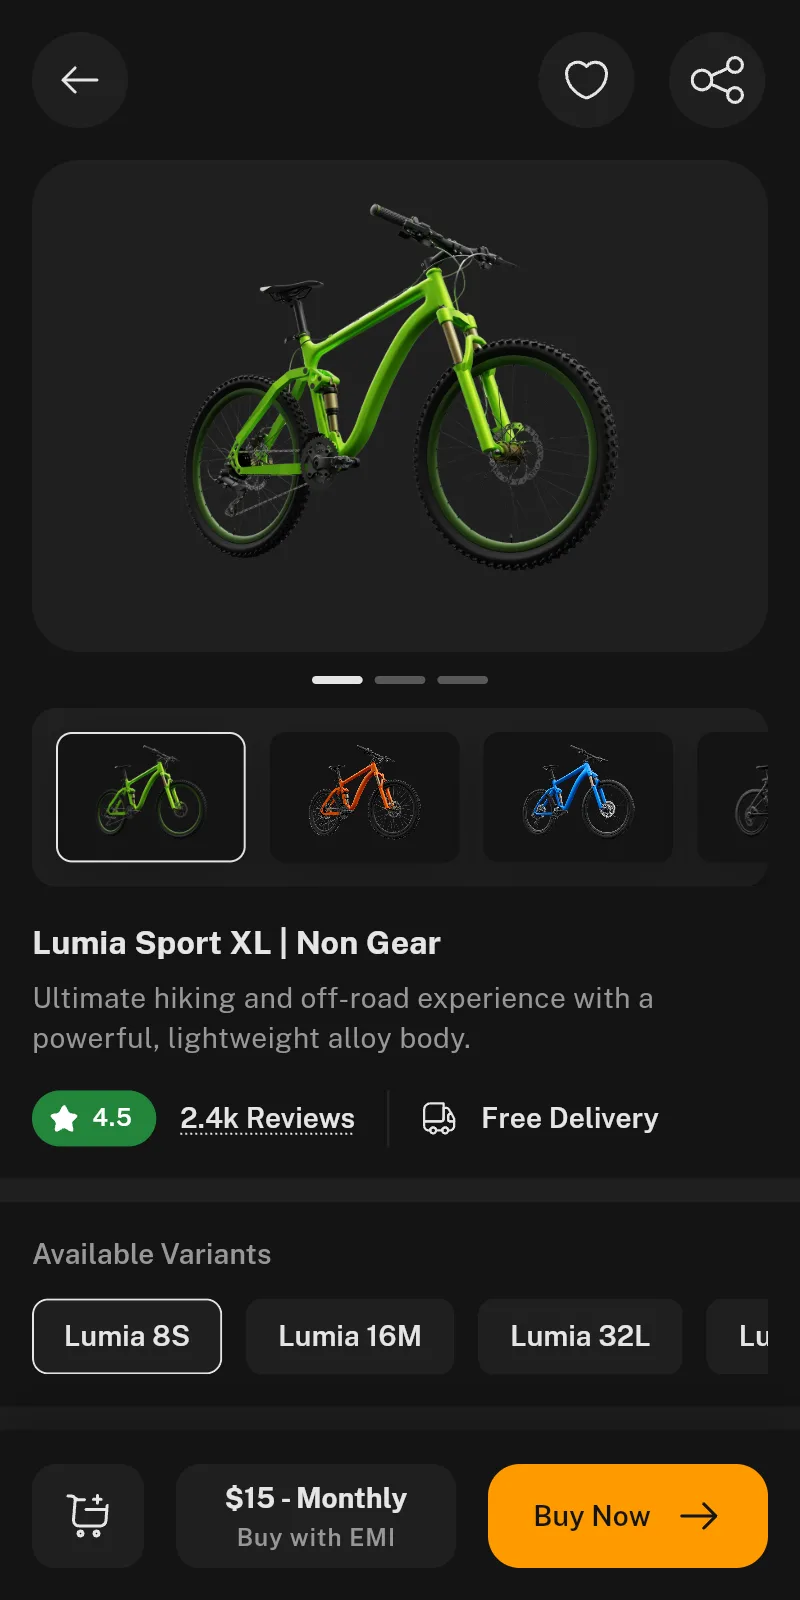
- Product details: photo gallery, colour and variant selection, price with discount, EMI plans, delivery check, ratings, reviews and all-reviews page.
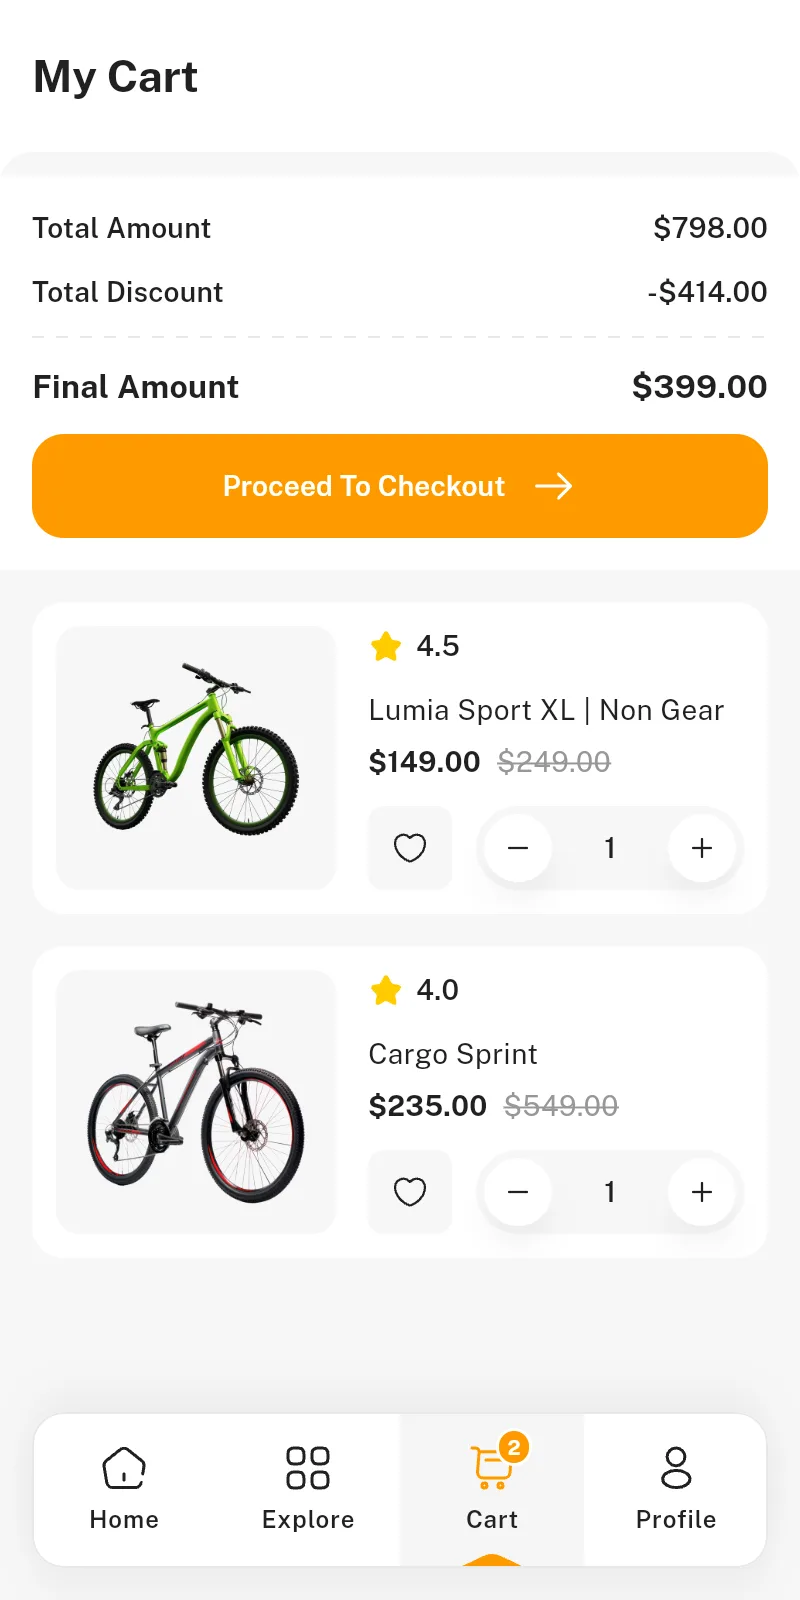
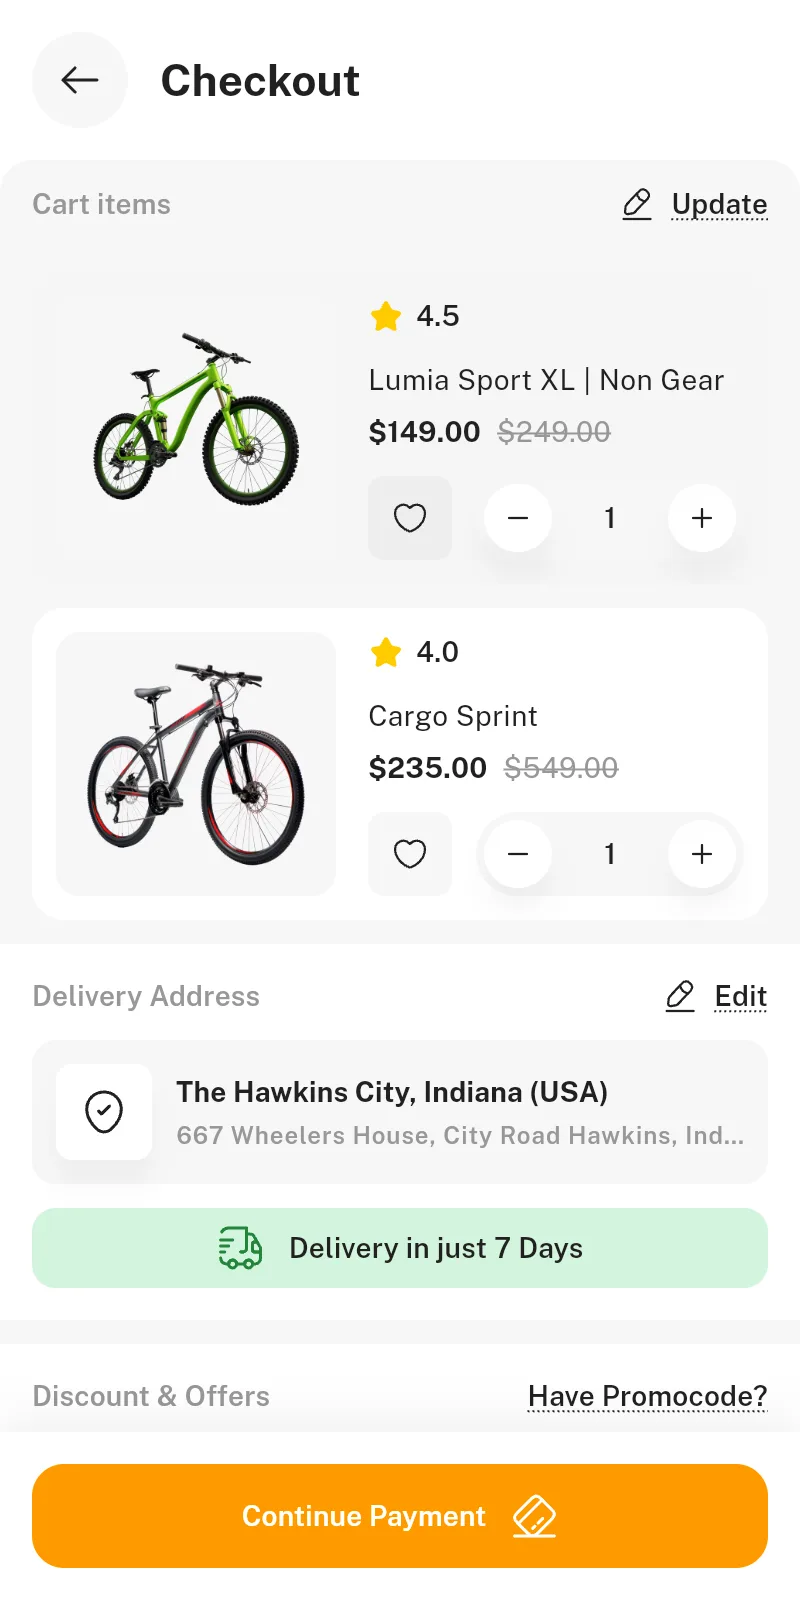
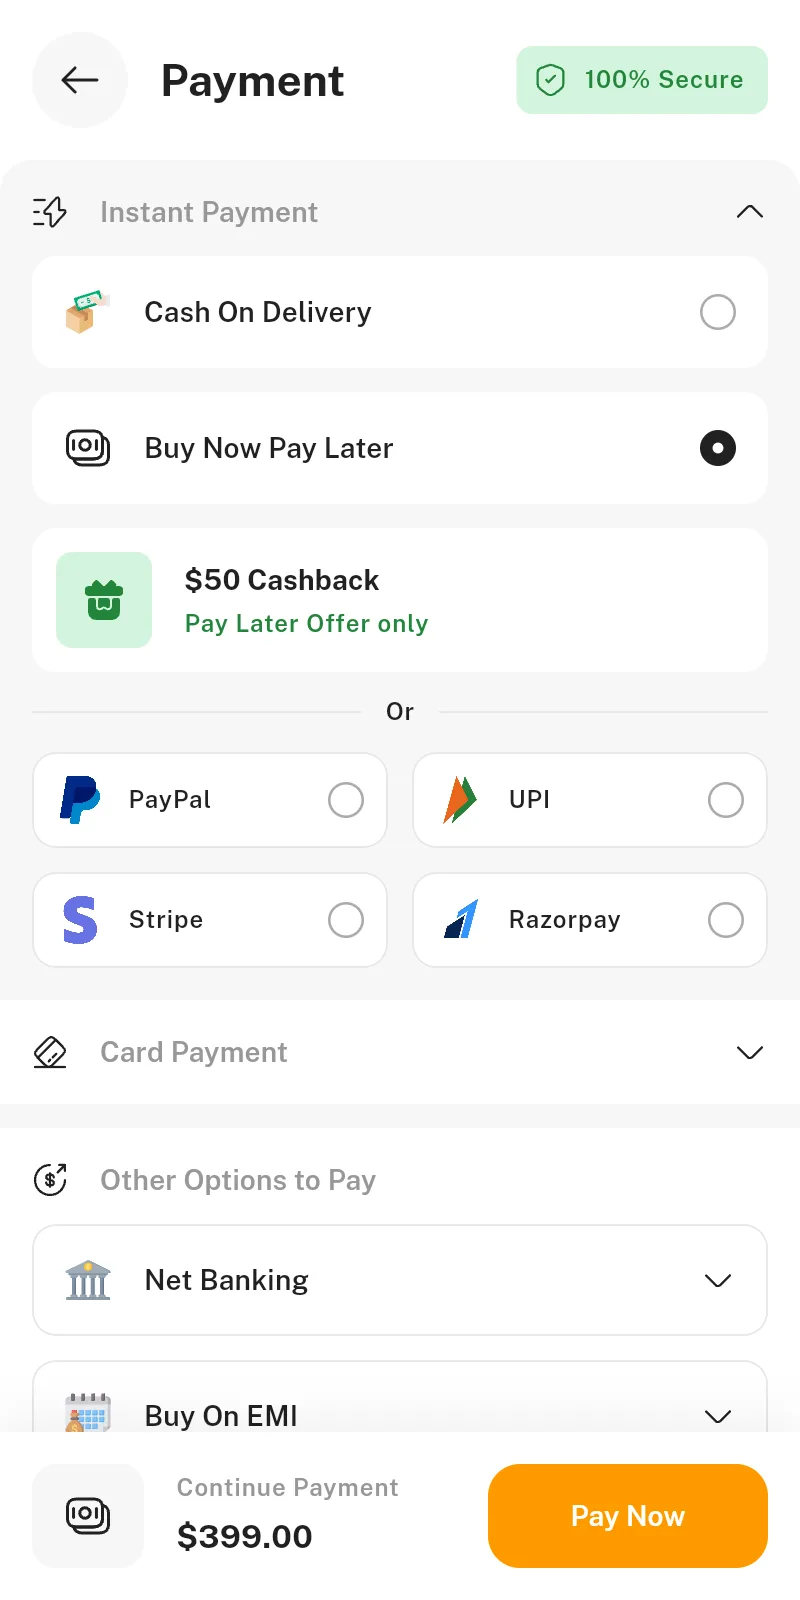
- Cart and checkout: cart with quantity steppers and a live count on the tab bar, wishlist, delivery address, promo codes, bill summary, and a payment screen with cash on delivery, Pay Later, PayPal, UPI, Stripe, Razorpay, cards, net banking and EMI.
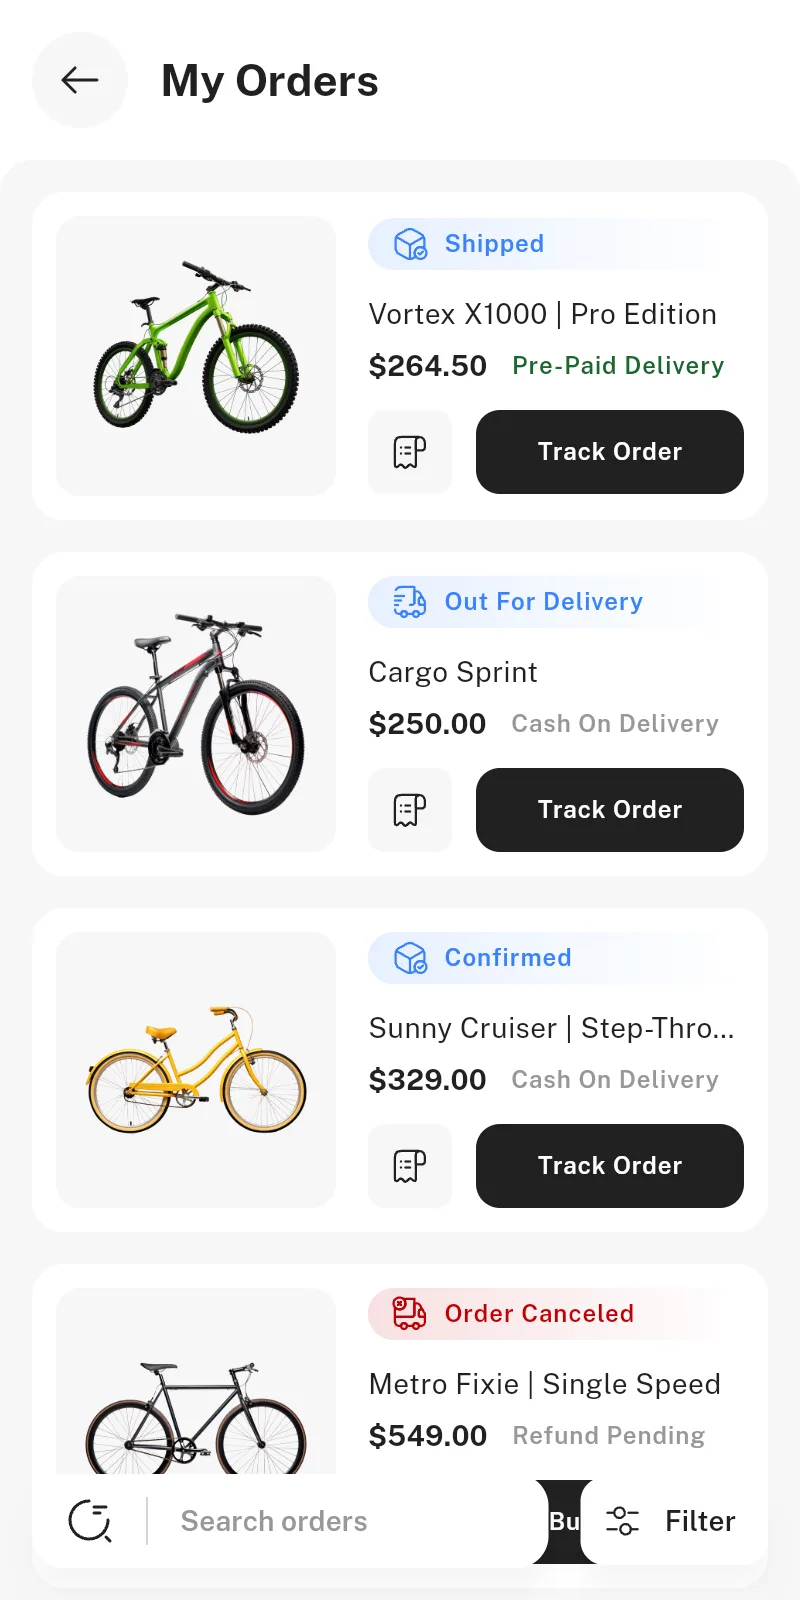
- Orders: my orders with filters, order details with tracking, cancel, reschedule delivery, change address or contact, invoice with share, and return with refund or exchange.
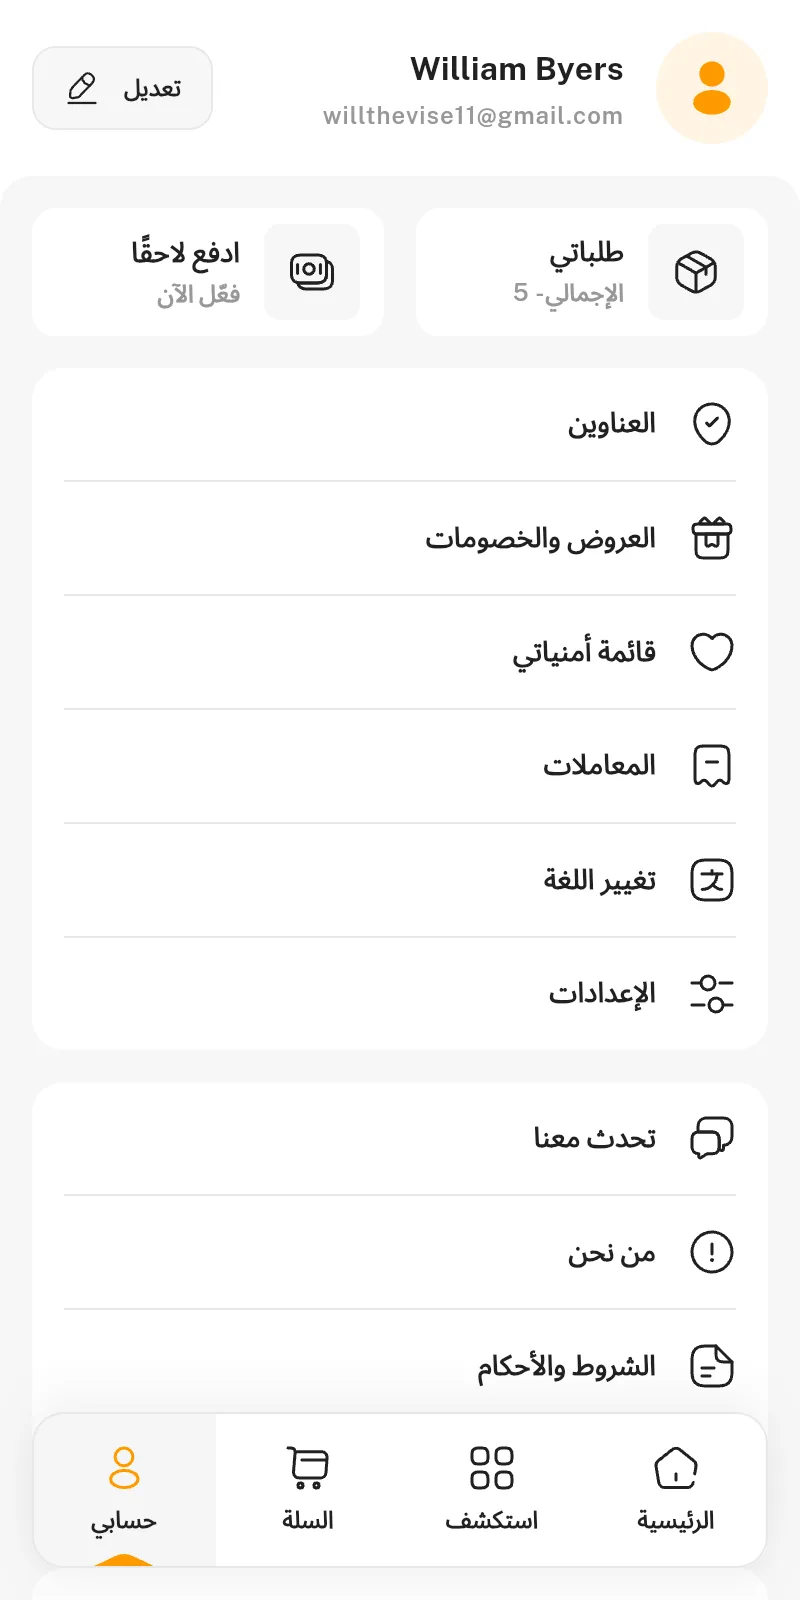
- Account: profile, edit profile, addresses, offers and coupons, transactions, Pay Later (activation, instalments, statement, auto pay), notifications, write a review, settings with theme and language, rate and share the app.
- Support: live-chat screen with photo and file attachments (camera, gallery and file manager), About, Terms and Privacy pages.
- Built in: light and dark themes, English and Arabic with full RTL, phone and tablet layouts, large-text support, loading, empty and error states with Retry on every data screen.
- Web: the same app runs in the browser, inside a phone or tablet frame with a device picker, ready to host as a live demo.
04 Getting Started, Step by Step
Choose the path that fits you. Both end with the app running on your phone, emulator or browser.
For developers (5 minutes)
If Flutter is already installed and flutter doctor is green:
cd BicyCart-Flutter-Source
flutter pub get
flutter run
Then skip to Rebranding and Connecting a Real API.
For non-technical buyers (first-time setup)
You only do steps 1–4 once on a computer. Allow about an hour, most of it waiting for downloads.
- Install Flutter. Open
docs.flutter.dev/get-started/install, choose your operating system (Windows or macOS), choose Android as the target, and follow the page. It installs Flutter and Dart together. - Install Android Studio from
developer.android.com/studio. Open it once and let it download the Android SDK. Then open Device Manager and create a virtual phone (any recent Pixel is fine). - Install VS Code from
code.visualstudio.com, open it, go to Extensions, and install the Flutter extension (it adds Dart too). - Check everything. Open a terminal (Windows: PowerShell; macOS:
Terminal), run the command below, and follow any instruction it prints until
the Flutter and Android lines show a green tick. If it asks you to accept Android
licences, run
flutter doctor --android-licensesand typeyto each.flutter doctor - Unzip the download from CodeCanyon to a simple location, such as your Documents folder.
- Open the project. In VS Code choose File → Open Folder and
select the
BicyCart-Flutter-Sourcefolder (not the outer folder). - Download the packages. In VS Code open Terminal → New
Terminal and run:
flutter pub get - Start a phone. Start the virtual phone from Android Studio’s Device Manager, or plug in an Android phone with USB debugging turned on (Settings → About phone → tap Build number seven times, then Developer options → USB debugging).
- Run the app. In the same terminal run the command below. The first run
takes a few minutes; later runs are much faster.
flutter run - Sign in with the demo details in Demo login, or tap Skip to browse as a guest.
Run flutter run -d chrome to open the app in Google Chrome instead.
It is the quickest way to look around.
To make an installable Android file (APK) to send to your phone or your team, see Building for Release.
05 Screenshots
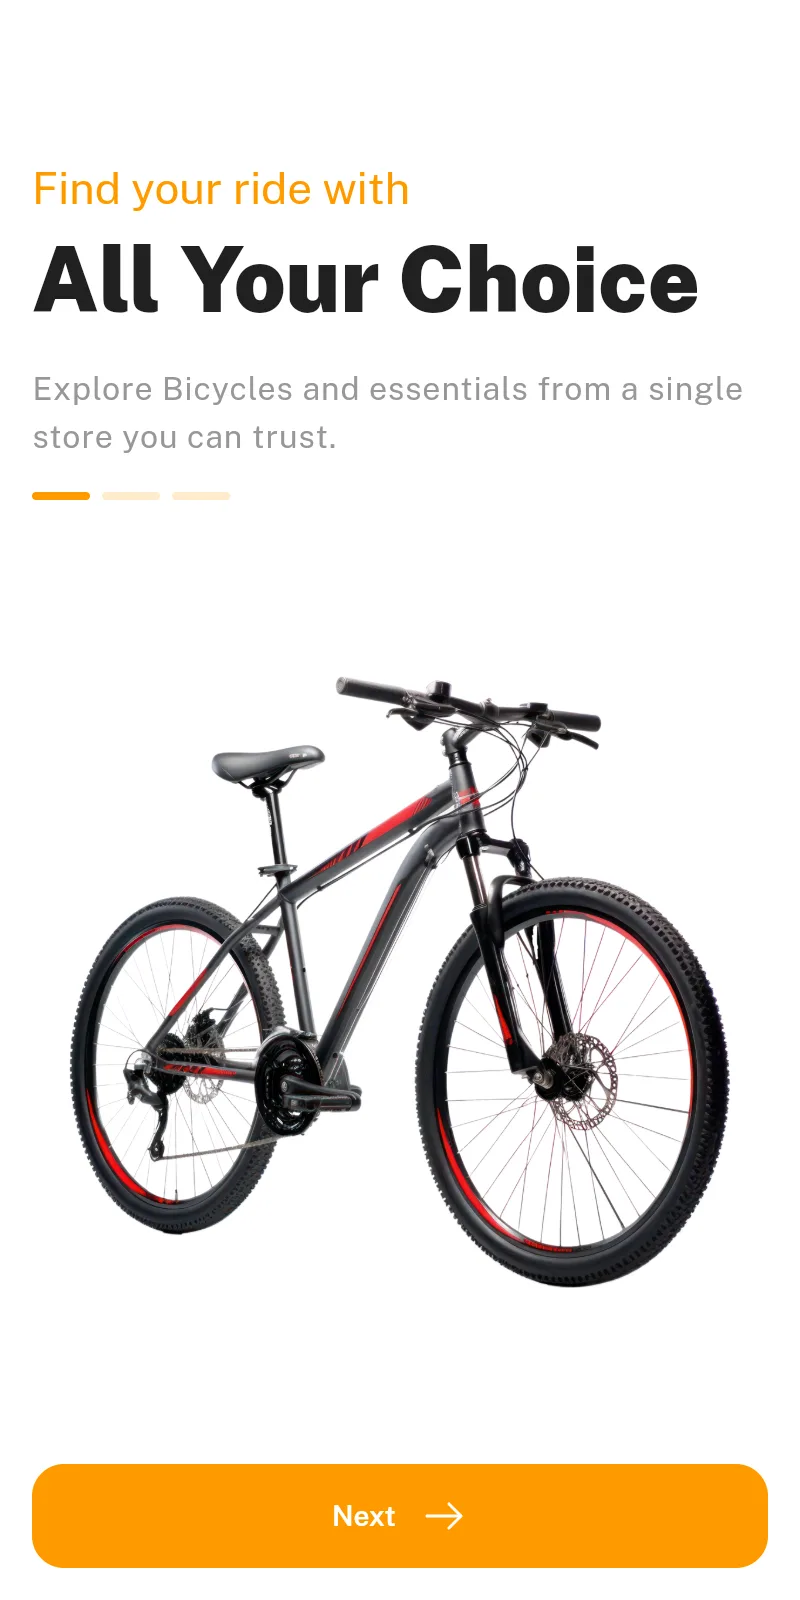
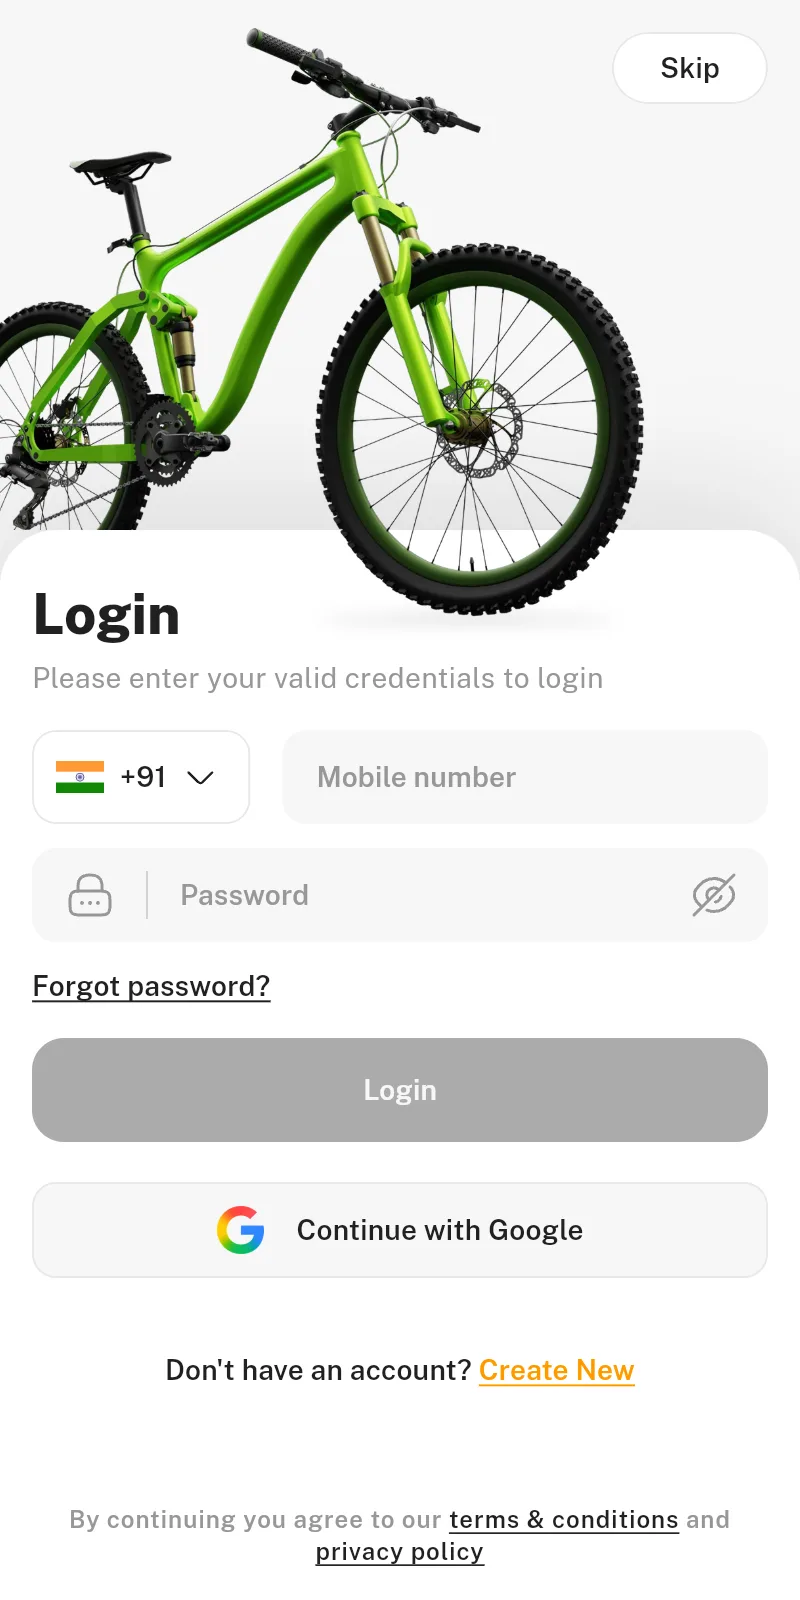
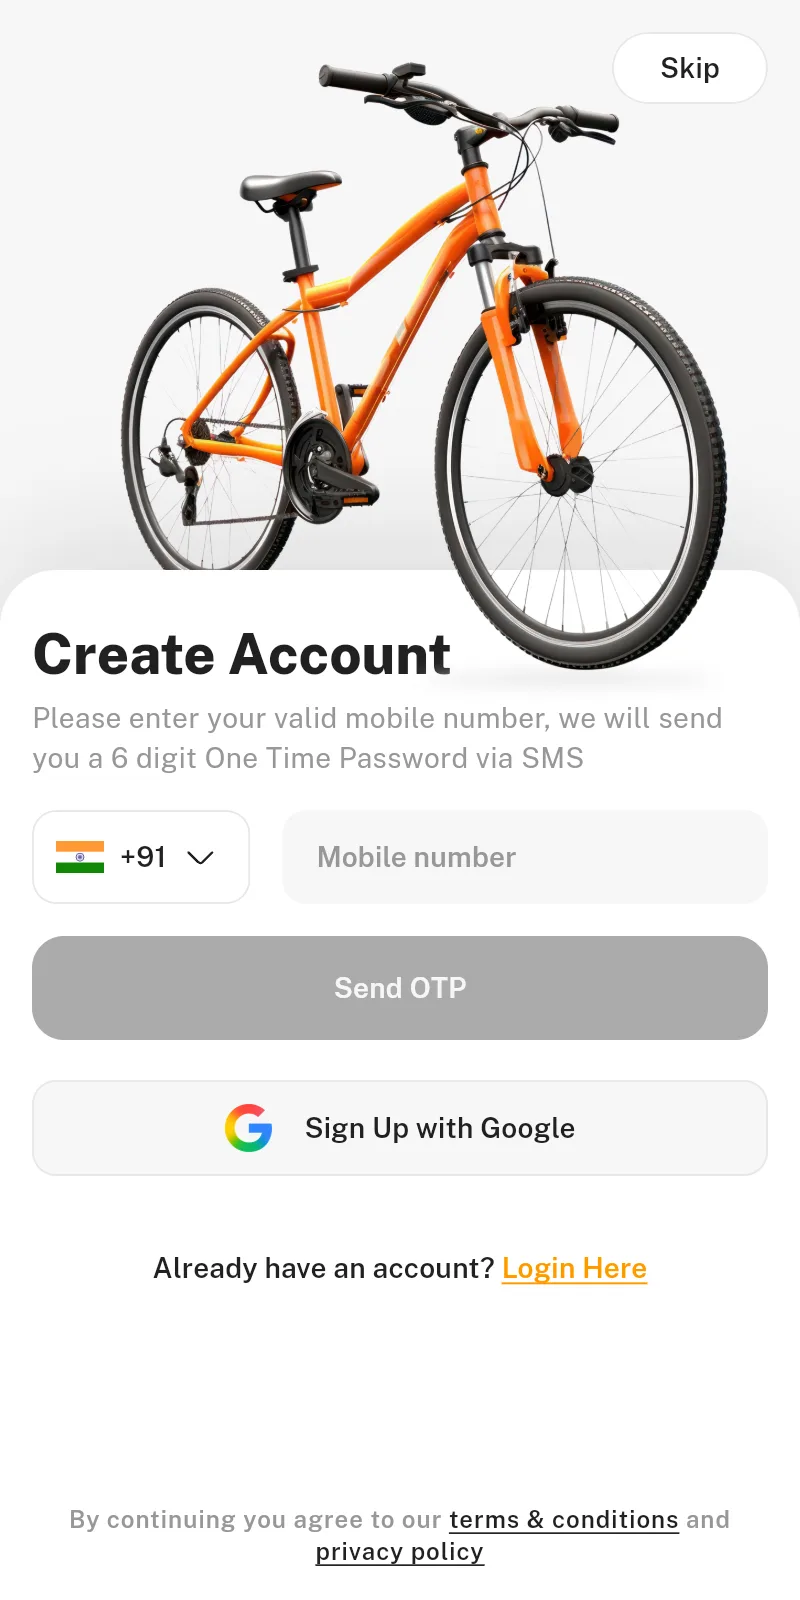
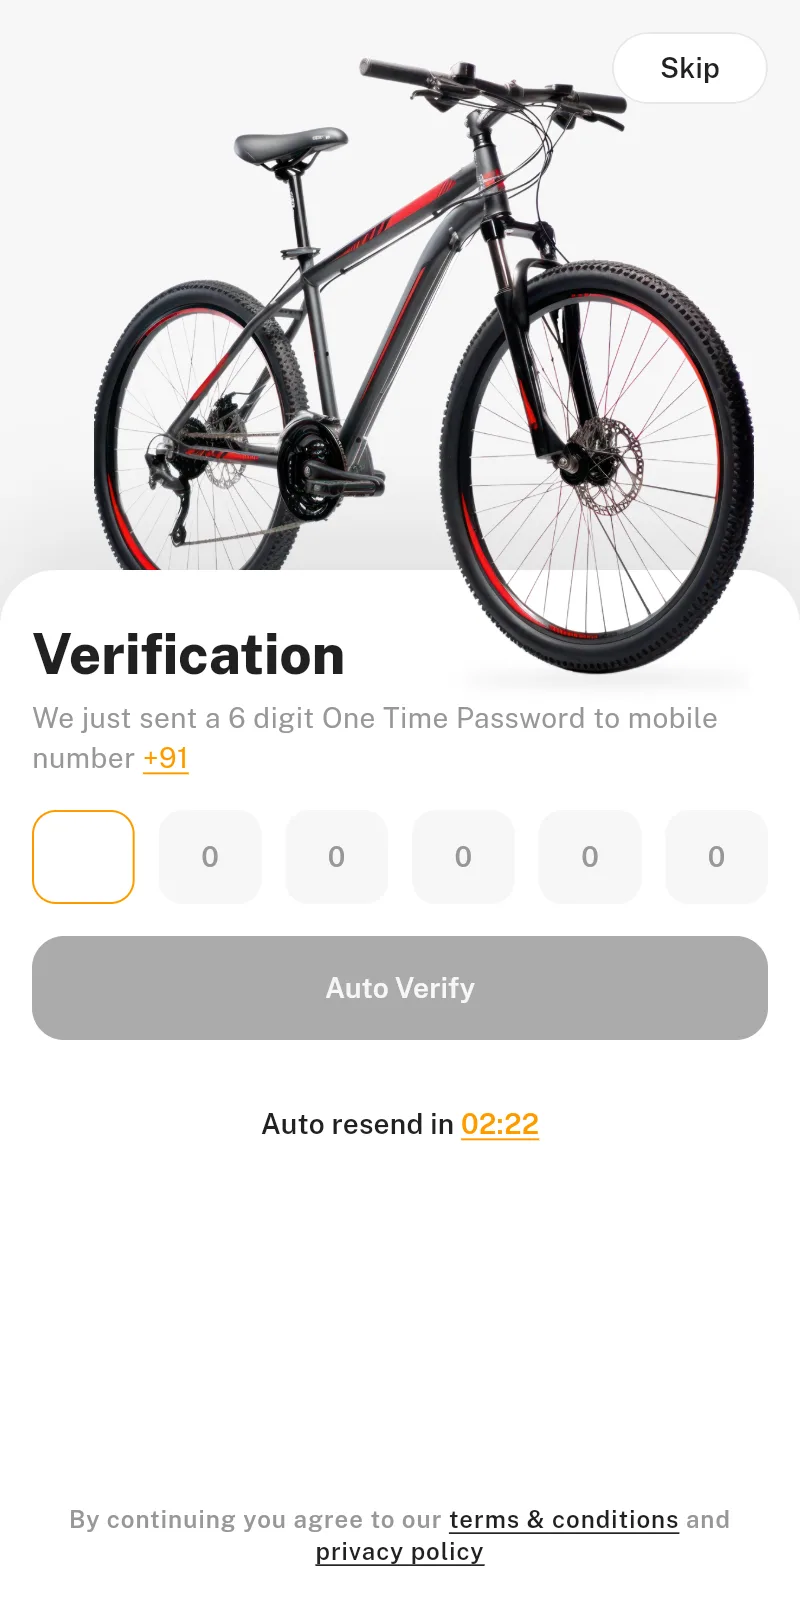
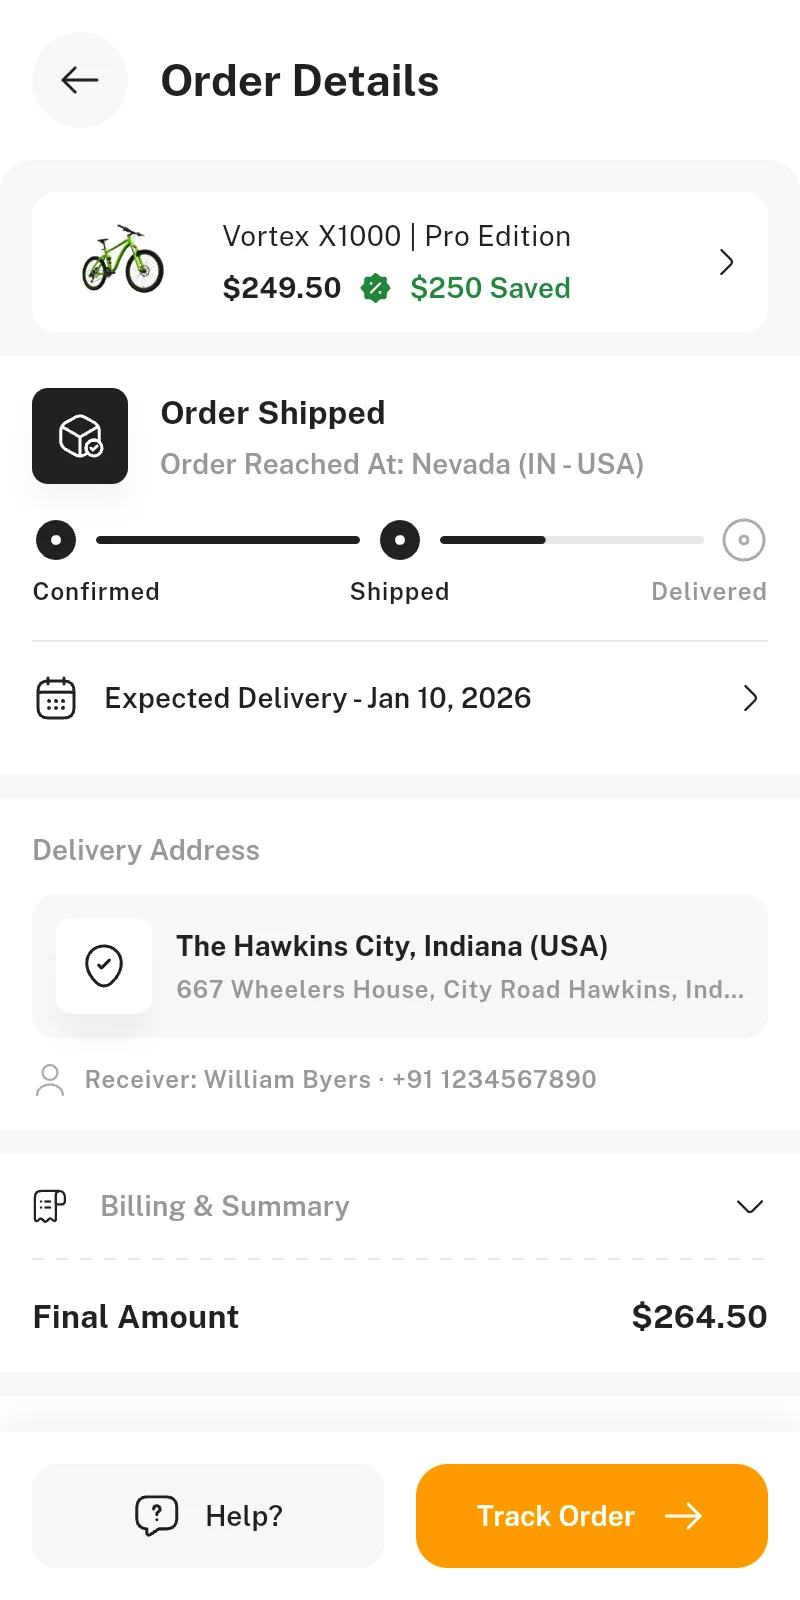
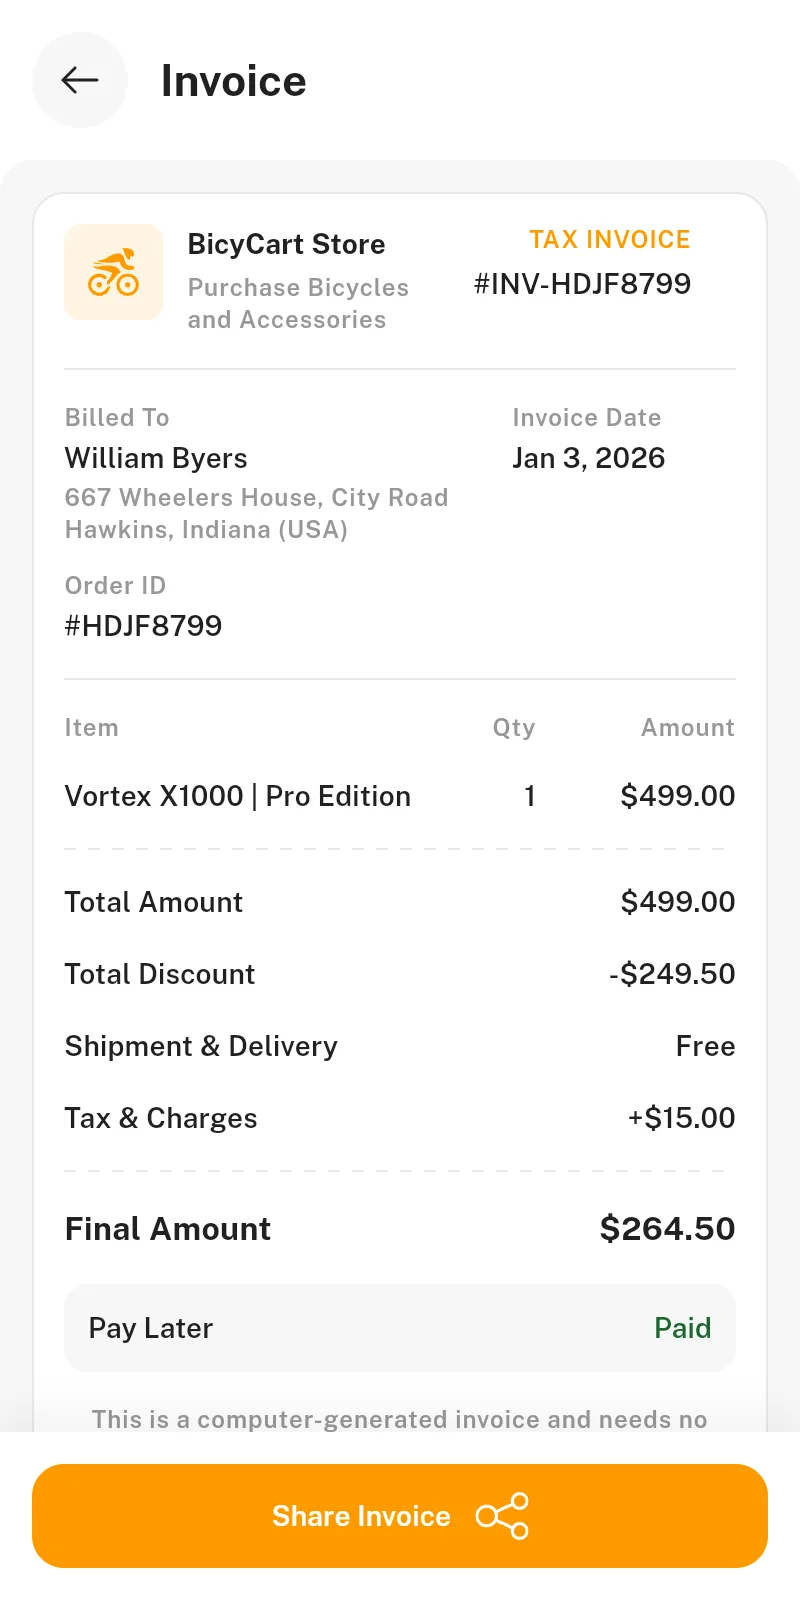
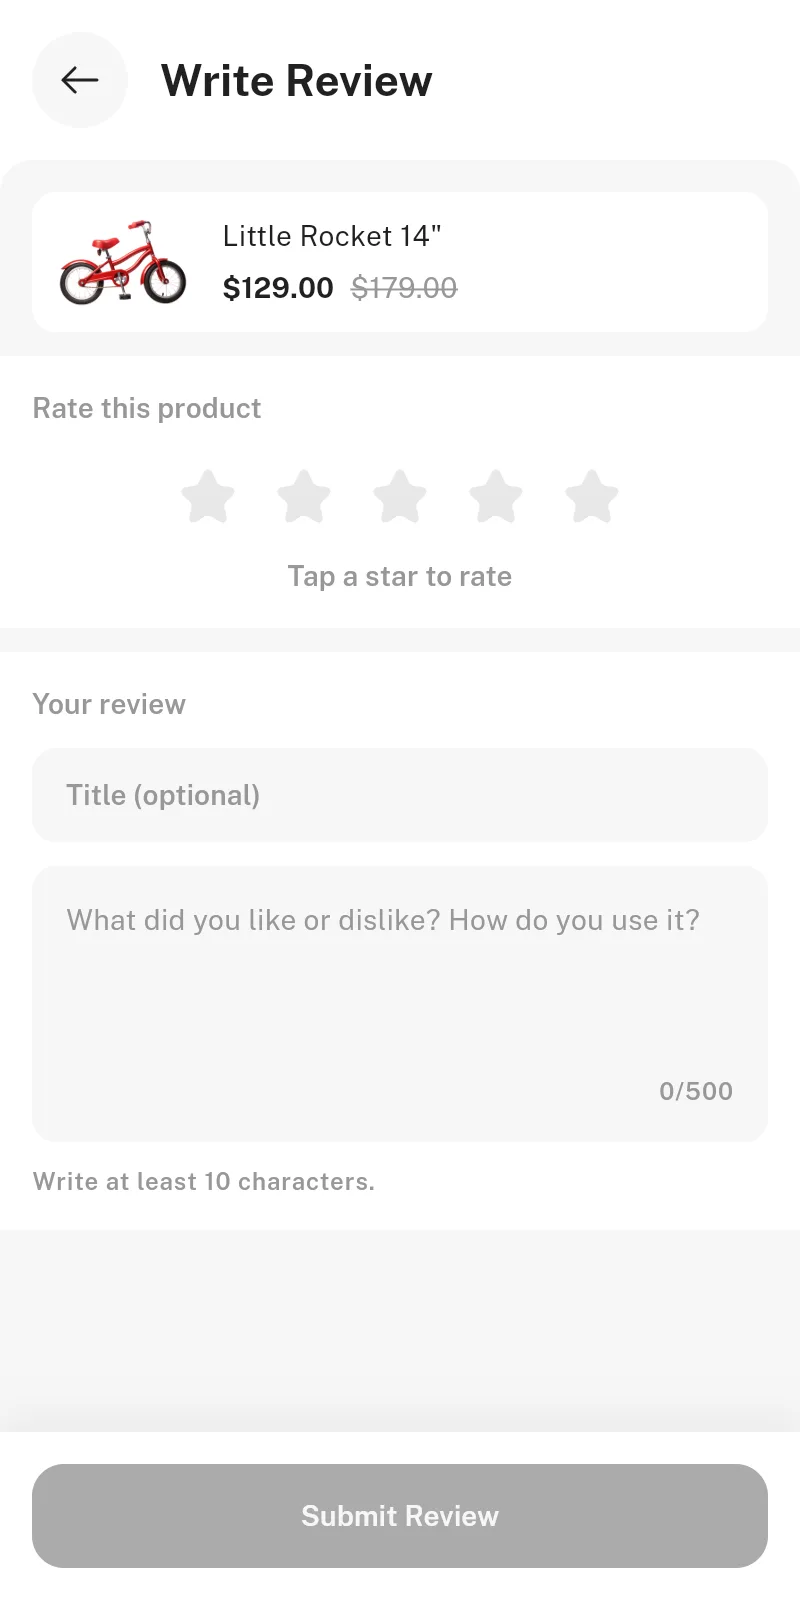
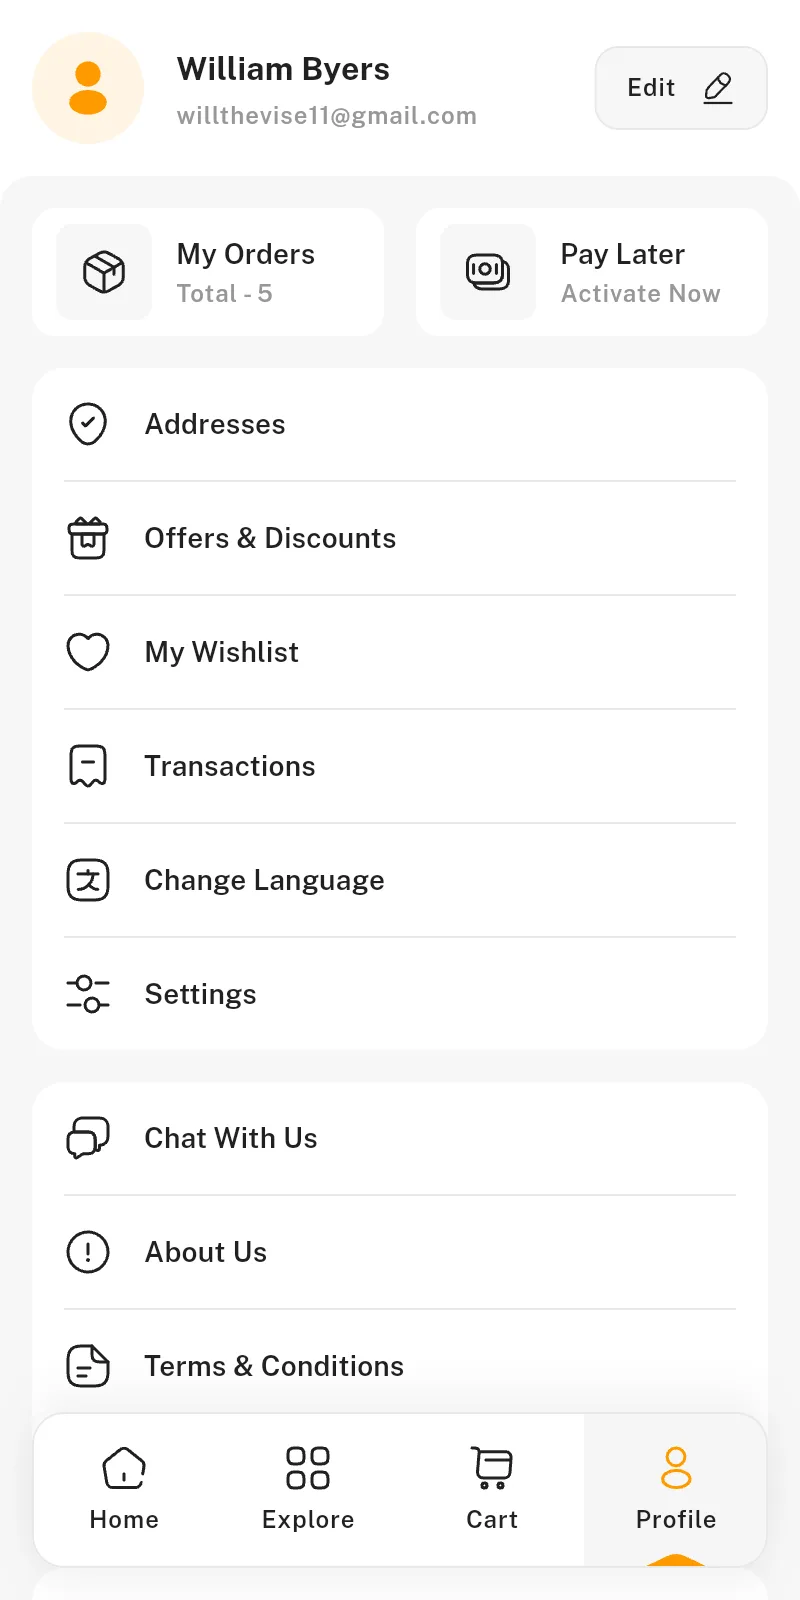
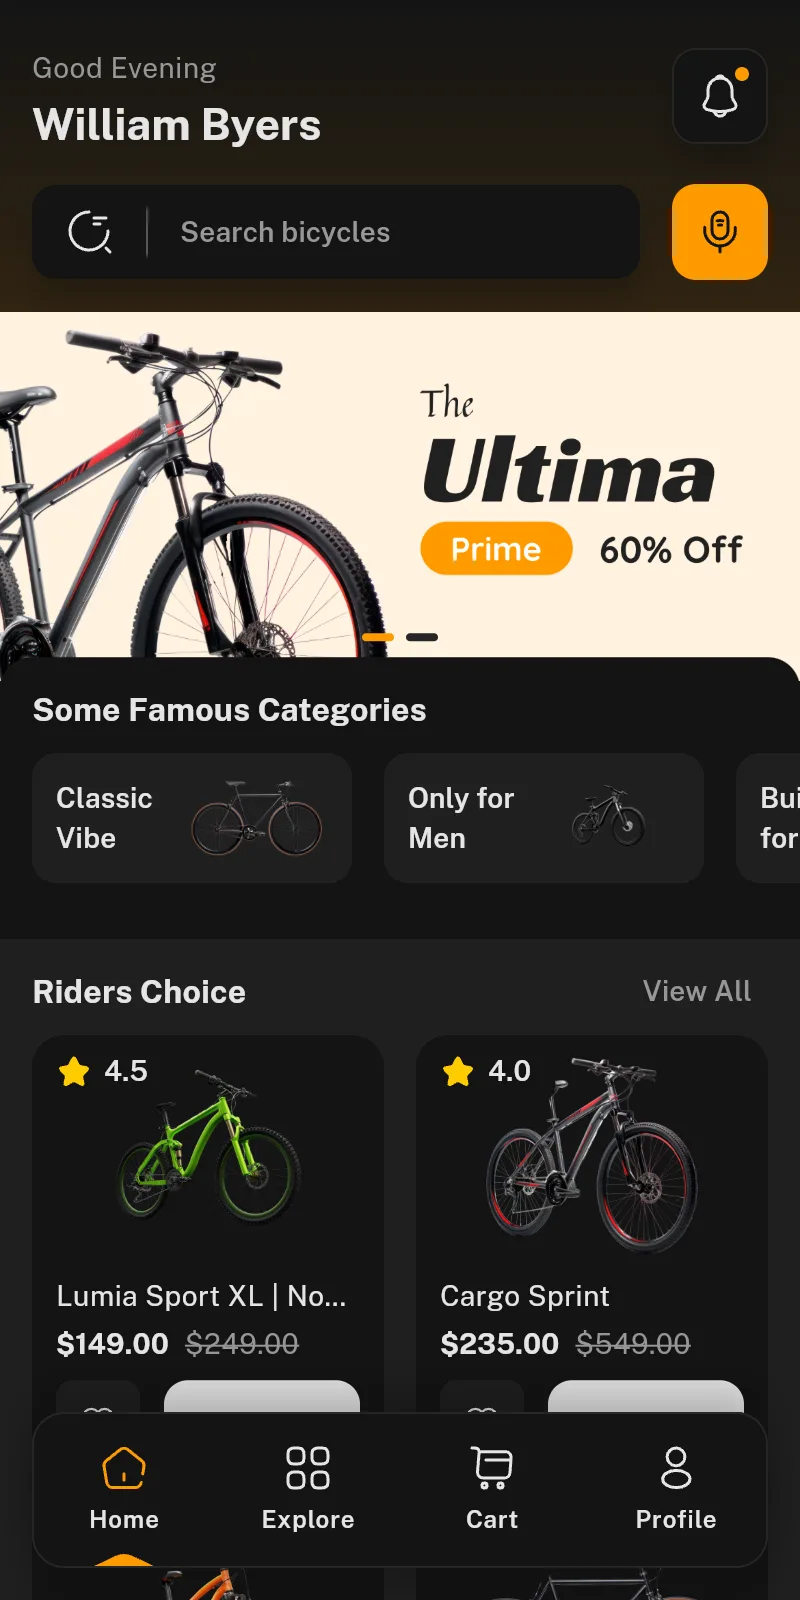
Every screen below is from the running template with the bundled sample data.
Onboarding and Authentication
Home and Discovery
Cart and Checkout
Orders
Account
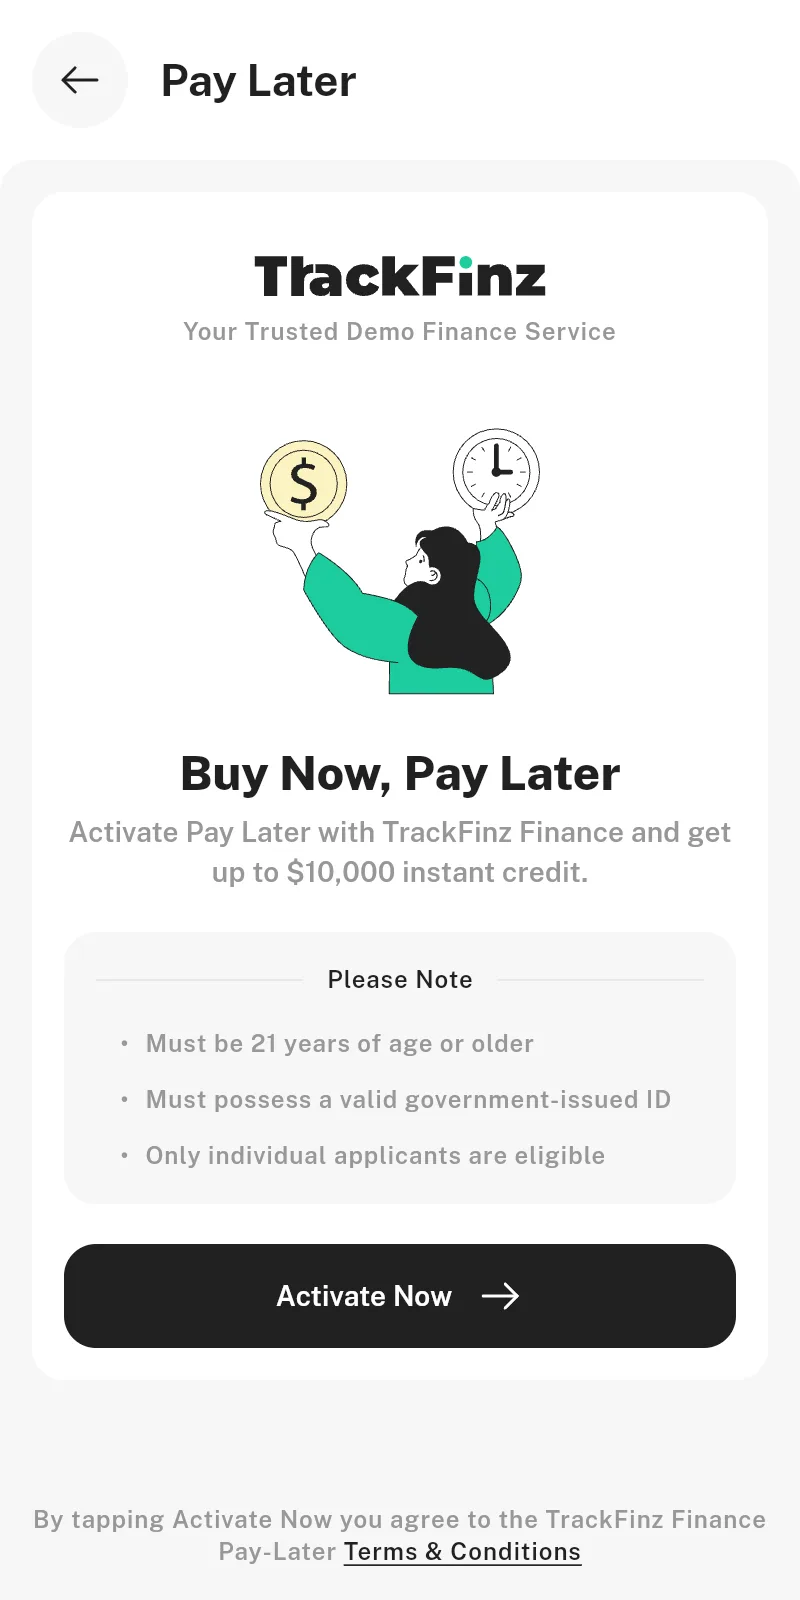
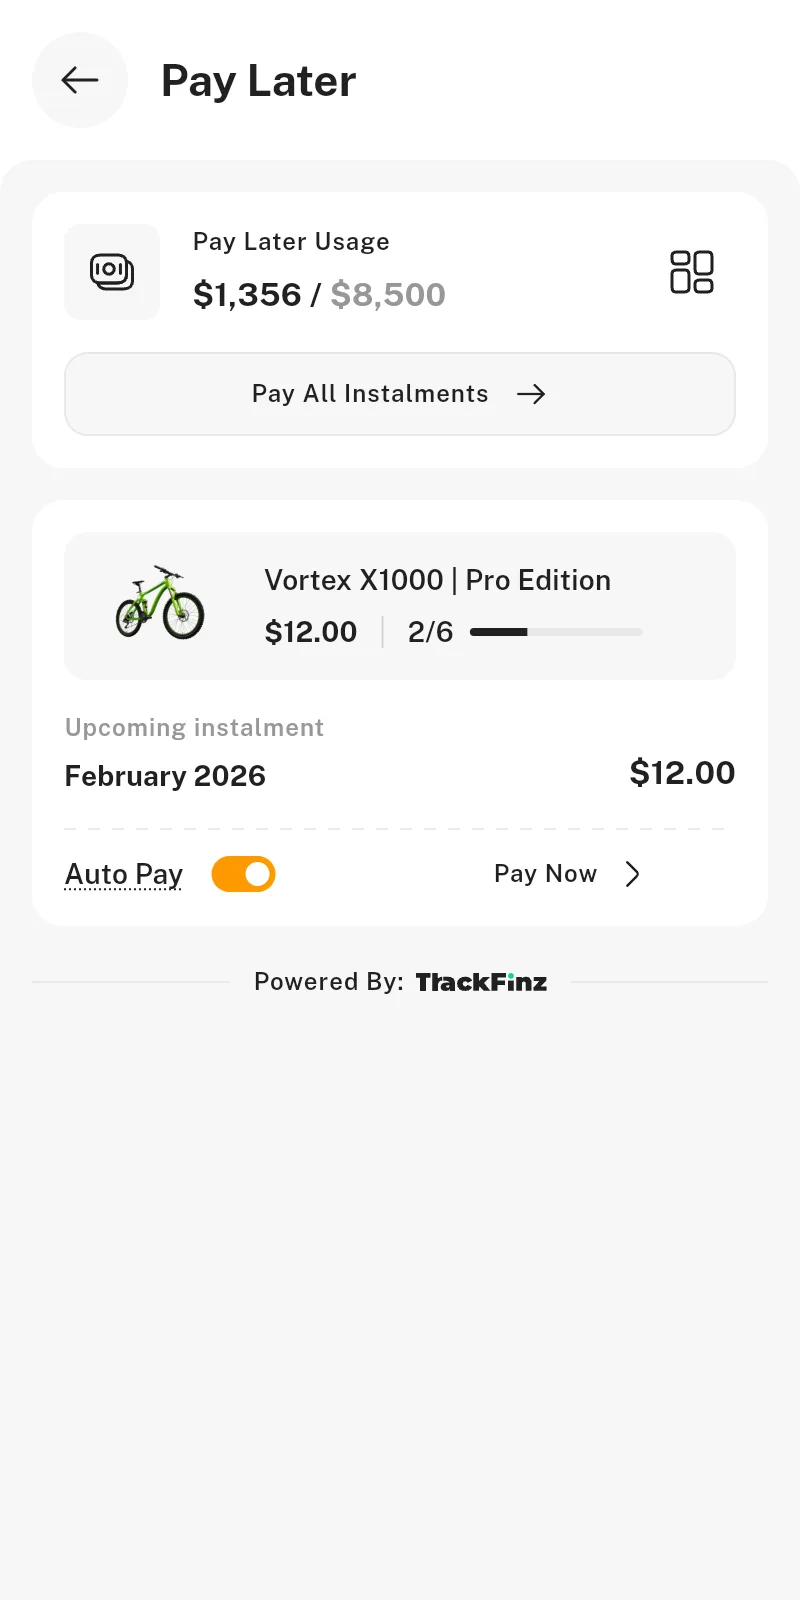
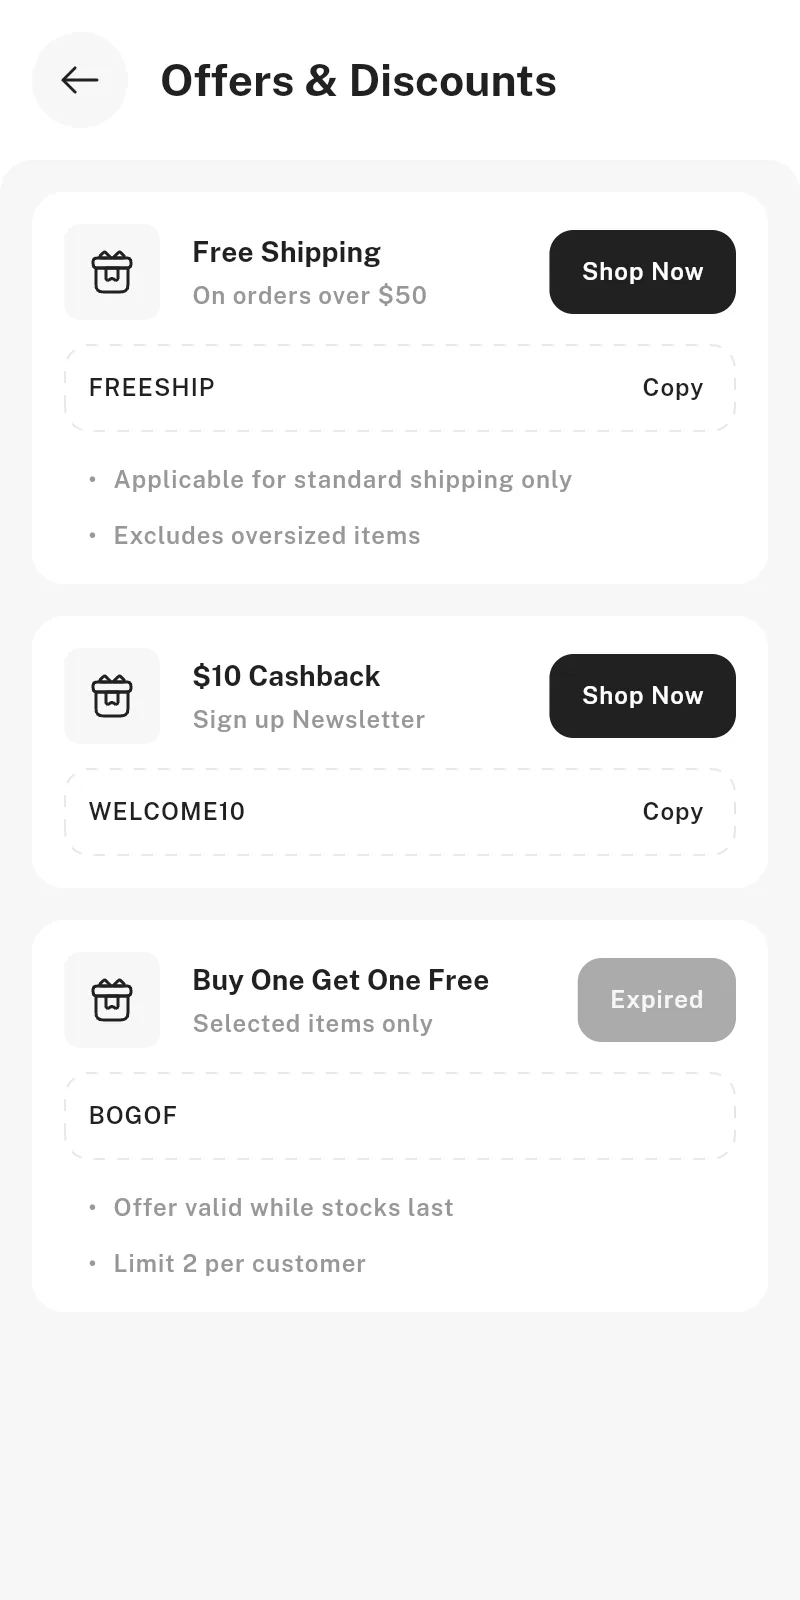
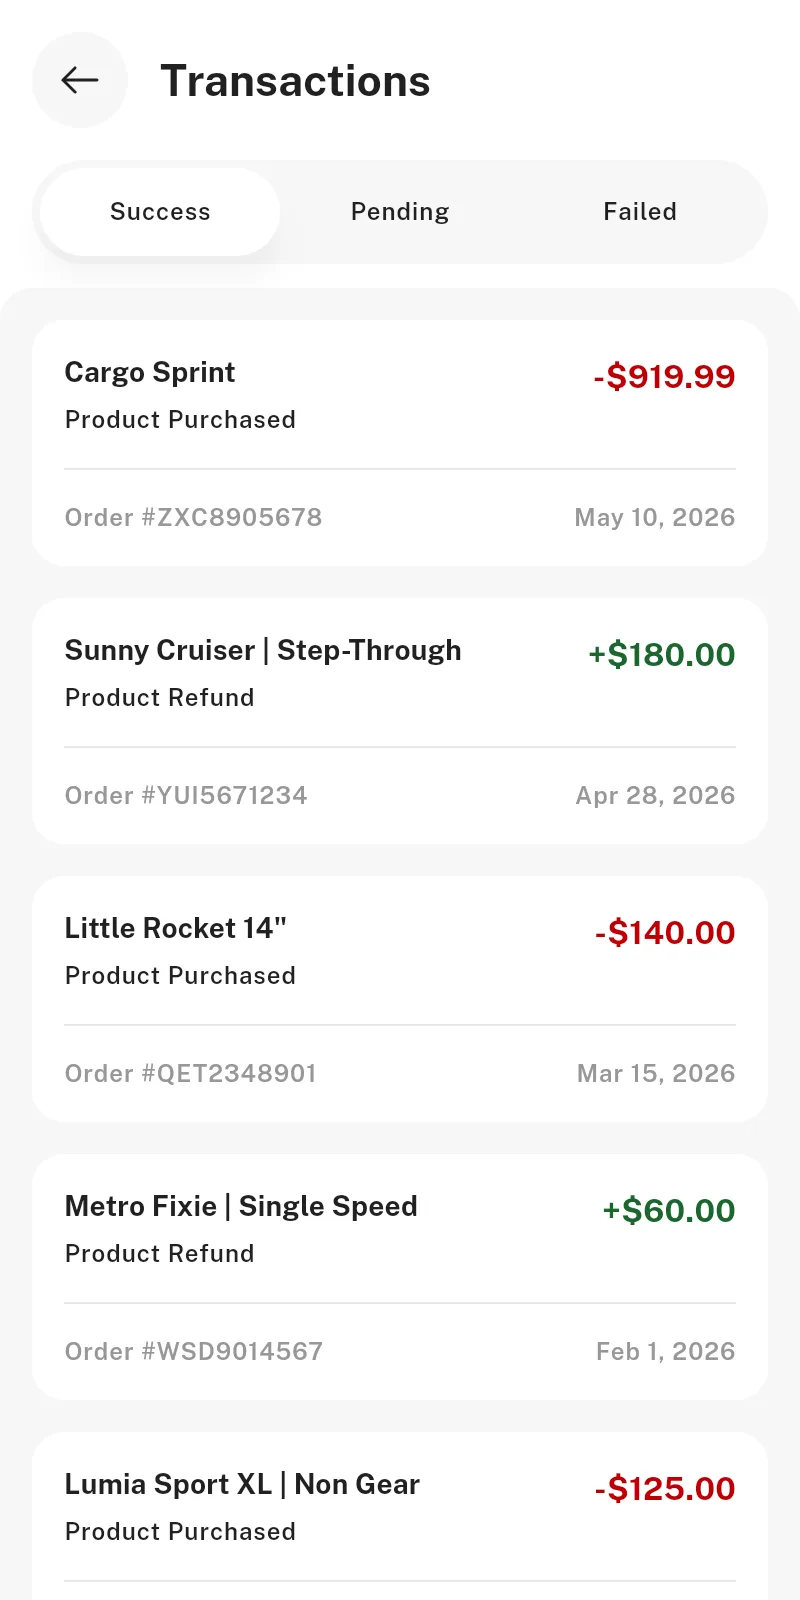
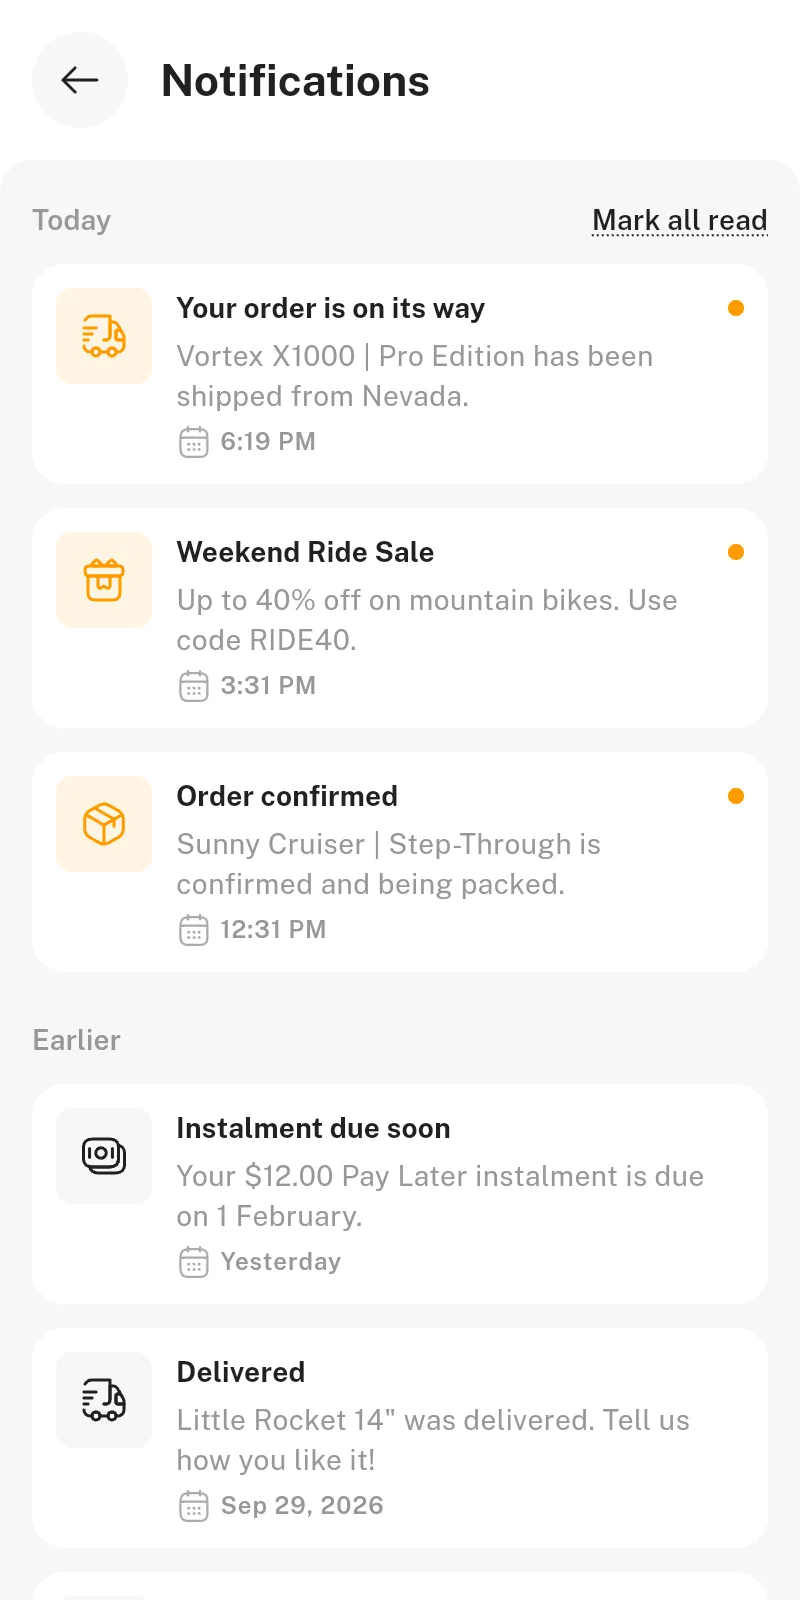
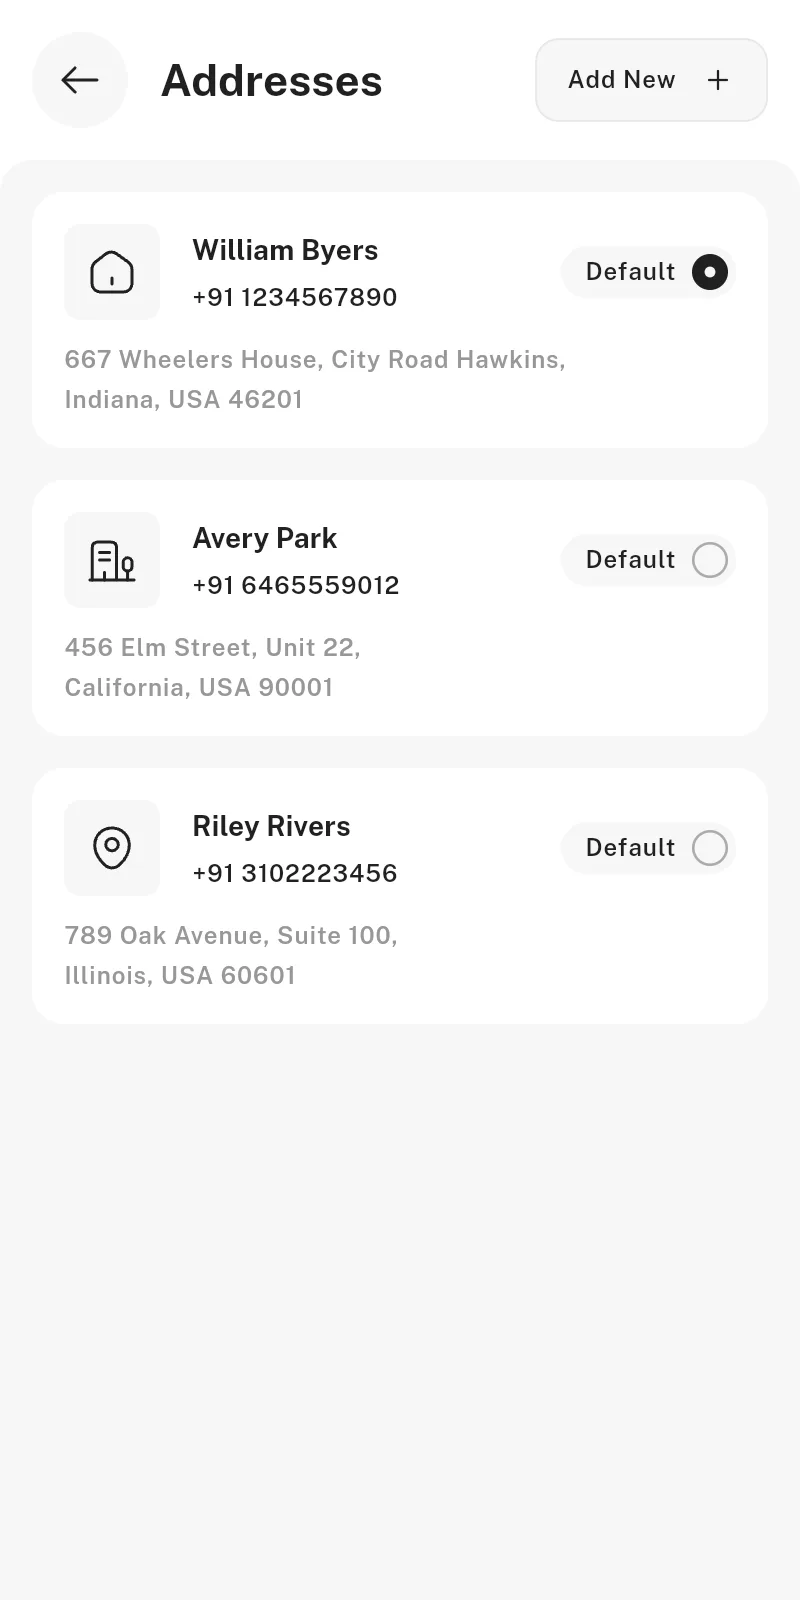
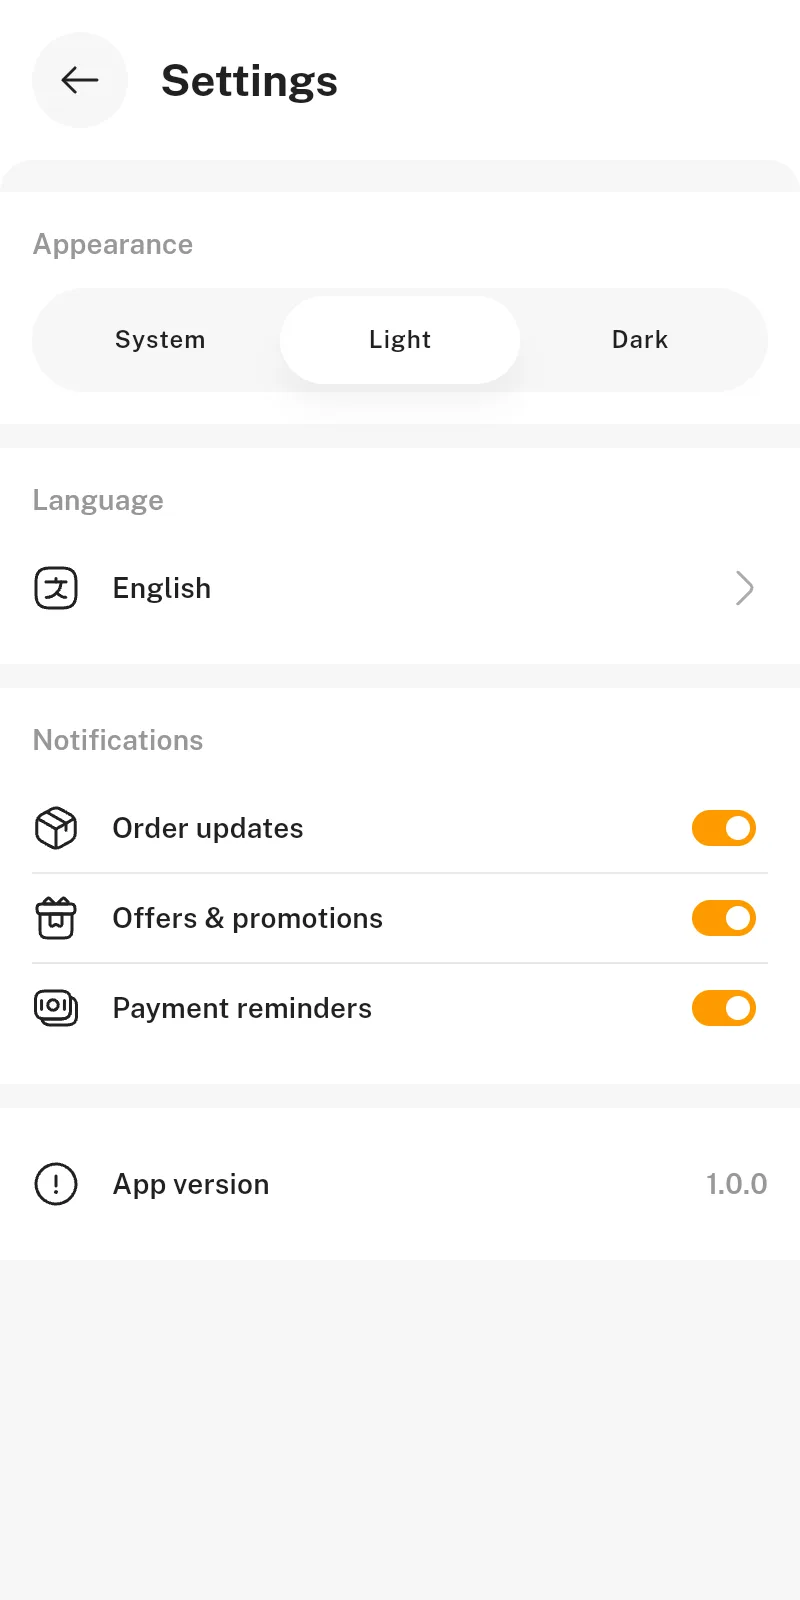
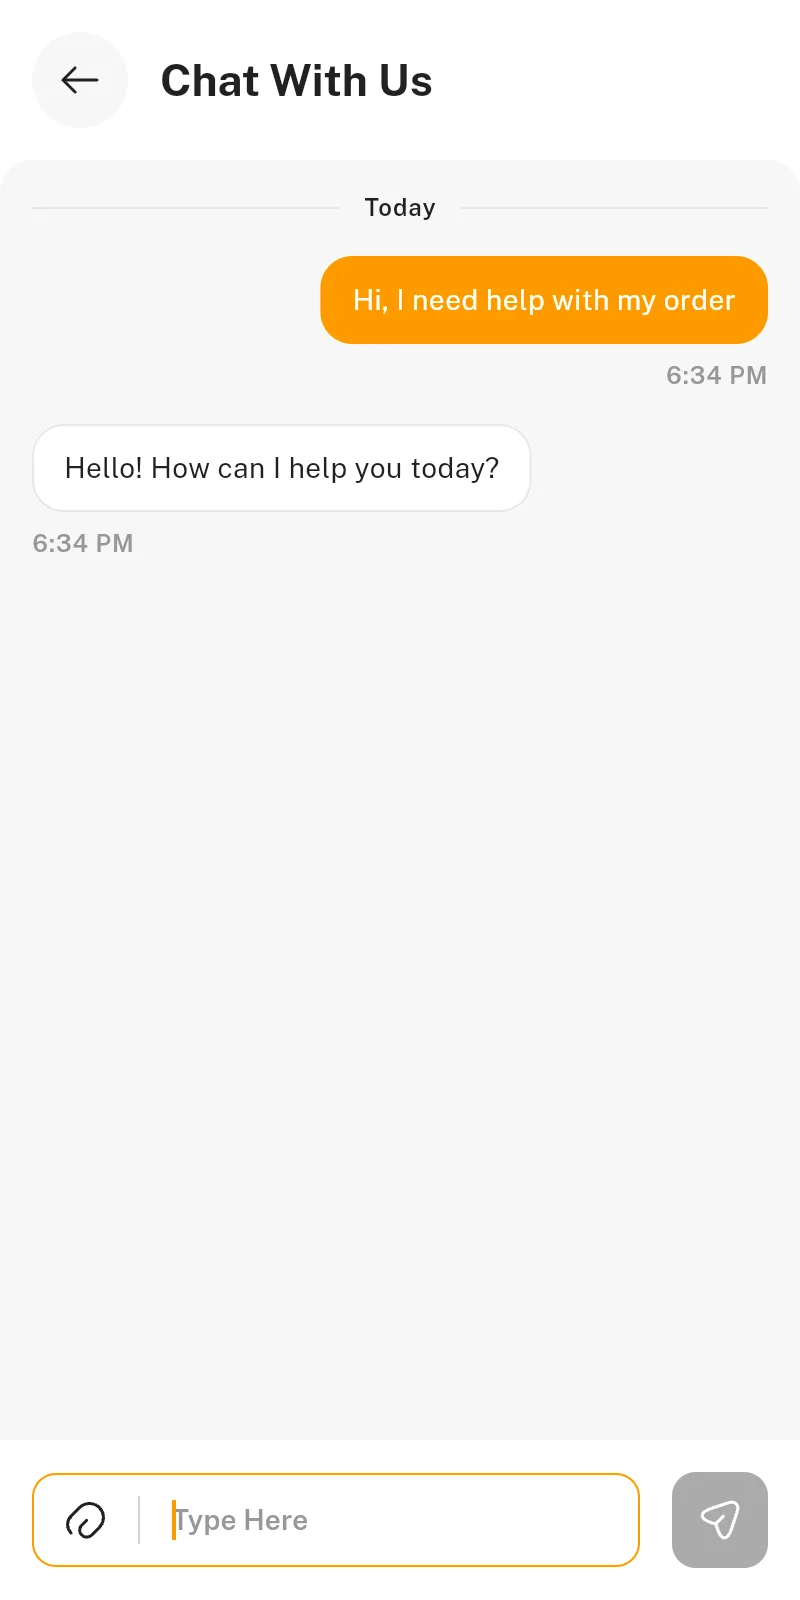
Dark Mode and Right-to-Left
06 Key User Flows
How the main journeys move from screen to screen. Each step is what the user sees after tapping the highlighted action on the step before.
Sign up
Create Account (enter a mobile number, tap Send OTP) → OTP Verification (enter the code, tap Auto Verify) → Complete Profile → Home.
Find a product and buy it
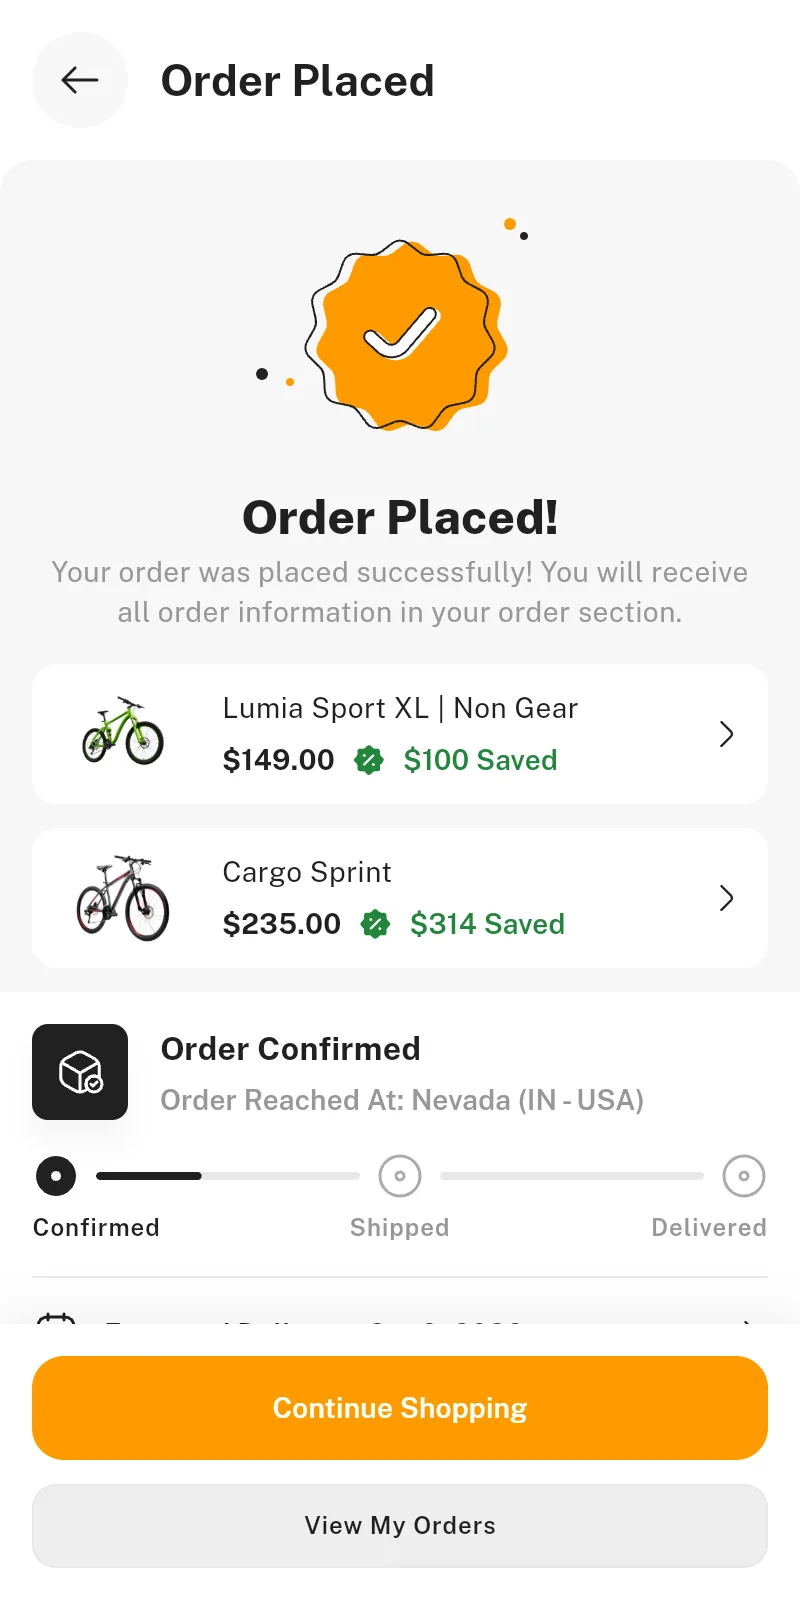
Home or Search → Product Details (pick a colour and variant) → Add to cart → Cart (Proceed To Checkout) → Checkout (address, promo code, Continue Payment) → Payment (Pay Now) → Order Placed.
After the purchase
Profile → My Orders → Order Details (track, cancel, reschedule, change address, Need Help?) → Invoice (share) or Return, and Write Review once delivered.
Pay Later
Profile → Pay Later (Activate Now) → account with usage, instalments, Pay Now and statement.
07 Requirements
Before you begin, make sure the following are installed on your machine.
| Requirement | Version / notes |
|---|---|
Flutter SDK | Latest stable release, on the stable channel |
Dart SDK | Bundled with the Flutter SDK above — no separate install needed |
Android Studio | Latest stable, with the Android SDK and an emulator or a physical device. Required for Android builds. |
Xcode | Latest stable, with CocoaPods installed. Required for iOS builds, and only available on macOS. |
Java | JDK 17. The Android build is configured for Java 17. |
Editor | VS Code with the Flutter extension, or Android Studio with the Flutter plugin. |
Platform targets: Android uses the Flutter default minimum SDK level, iOS targets version 15.0 and above, and the web build runs in current Chrome, Edge, Safari and Firefox.
Confirm your Flutter installation is healthy:
flutter --version
flutter doctor
Resolve anything flutter doctor reports as a problem before
continuing. A missing Android licence or an unconfigured Xcode is the most common
cause of a failed first build.
08 Installation
- Download the item from CodeCanyon and extract the ZIP archive.
- Open a terminal and change into the Flutter project folder:
cd path/to/BicyCart-Flutter-Source - Fetch the Dart package dependencies:
flutter pub get - On macOS, if you intend to build for iOS, install the CocoaPods dependencies:
cd ios
pod install
cd ..
That is the entire installation. No database, no server, no API keys and no accounts are required to run the app.
If pod install fails, run pod repo update first and
try again. On Apple Silicon Macs you may also need
sudo gem install cocoapods.
09 Running the App
List the devices Flutter can currently see:
flutter devicesLaunch the app on a connected phone, simulator or emulator:
flutter runTo run it in a browser instead, which is handy for quickly reviewing screens:
flutter run -d chromeThe app opens on the splash screen and moves through onboarding into the main experience. Tap Skip on any sign-in screen to browse as a guest, or log in with any phone number and password; the demo accepts every input. Every screen is reachable from the UI.
Demo login
Sign-in is simulated, so any valid-looking details work. These are ready to use, in the app and in the live preview:
| Field | Demo value |
|---|---|
| Mobile number | 1234567890 (any 10 digits) |
| Password | 123456 (any 6 or more characters) |
| OTP code | 123456 (any 6 digits) |
| Promo code at checkout | BICY20 |
You can also tap Skip on any sign-in screen to browse as a guest.
Debug builds are slower than the real app. To judge performance on a
phone, run flutter run --release.
10 Project Structure
BicyCart uses a feature-first layout. Each feature is a self-contained folder
that owns its own screens, widgets, models and data source, while shared code
lives in core/ (infrastructure) and commons/ (reusable
widgets). Features never import each other’s widgets or models.
lib/
  main.dart                  Startup: preferences, theme, translations
  app.dart                   GetMaterialApp: routes, themes, languages
  core/
    config/app_config.dart   App name, currency, delivery days, limits
    constants/               Asset paths and translation keys
    data/                    Shared models, repositories and services
                             (cart, wishlist, orders, catalog, session…)
    localization/            Language list and translation loader
    routes/                  Route names, pages and route arguments
    storage/app_prefs.dart   Saved settings (theme, language, session)
    theme/                   Palette, colour scheme, text theme, spacing
  commons/
    widgets/                 53 shared App* widgets
  features/
    <feature>/               21 features: auth, home, cart, checkout,
      screens/               orders, product_details, profile, …
      widgets/               Widgets used only by this feature
      models/                Models used only by this feature
      repositories/          This feature’s data source (demo data today)
  utils/
    extensions/              Helpers on BuildContext and dates
    formatters.dart          Prices, file sizes, counts, phone masks
    validators.dart          Form validation rules
  web_preview/               Device frame for the web build only

assets/
  fonts/                     Public Sans (bundled, works offline)
  icons/                     84 SVG icons
  images/                    Product photos, logos, illustrations
  lang/                      en.json, ar.json

design/
  app_icon/                  Source images for the launcher icons
  tokens/                    Figma variable exports behind the theme

test/                        Widget tests (see Code Quality)
Key files you will edit most often:
| File | Purpose |
|---|---|
core/config/app_config.dart | App name, currency, fees, delivery and return days, store link |
core/theme/app_palette.dart | Every colour in the app, light and dark |
core/theme/app_text_theme.dart | Font family and text sizes |
core/theme/app_spacing.dart | Spacing, corner radius, icon sizes, animation durations |
core/routes/app_routes.dart | Route name constants |
core/routes/app_pages.dart | Route to screen mapping |
core/data/catalog_demo_data.dart | Sample products, categories, collections and banners |
assets/lang/*.json | All user-facing text |
11 App Configuration
Business settings live in one file,
lib/core/config/app_config.dart, so you rarely need to touch screen
code.
| Setting | What it controls |
|---|---|
appName, appVersion | Name and version shown in the app (keep the version in step with pubspec.yaml) |
storeUrl | Store listing opened by Rate Us and shared by Share this app |
currencySymbol | Symbol in front of every price (default $) |
taxAndCharges, standardDeliveryFee | Amounts added to the bill summary |
deliveryDays, returnDays | Promised delivery time and refund or replacement time |
emiMonths | EMI durations offered on product details and payment |
defaultCountry | Country preselected in phone number fields |
otpLength, otpResendDelay | Number of OTP digits and the wait before Resend |
minPasswordLength | Password rule on sign-up and reset |
splashDuration | How long the splash screen stays up |
payLaterProvider, payLaterMaxCredit | Pay Later partner name and credit limit |
maxAttachmentMb | Largest file accepted in the support chat |
demoCustomer… | The sample signed-in customer, until real authentication is connected |
12 Rebranding: Name, ID, Colours, Logo, Icon and Splash
Everything you need to turn BicyCart into your own brand is in this section, in the order we recommend doing it. Each step is independent, so you can stop after any of them and the app still runs.
| What | Where |
|---|---|
| App name | AndroidManifest.xml, Info.plist, app_config.dart, assets/lang/*.json |
| Package / bundle ID | android/app/build.gradle.kts, Xcode |
| Colours | lib/core/theme/app_palette.dart |
| Logo | assets/icons/logo_mark.svg |
| App icon | design/app_icon/ + one command |
| Splash screen | splash_screen.dart, launch screens |
| Font | assets/fonts/, app_text_theme.dart |
1. App name
The app name appears in three places: under the icon on the home screen, inside the app, and in the browser tab of the web build.
Android
Open android/app/src/main/AndroidManifest.xml and edit the
android:label attribute on the <application> tag:
android:label="Your App Name"iOS
Open ios/Runner/Info.plist and edit the value under
CFBundleDisplayName:
<key>CFBundleDisplayName</key>
<string>Your App Name</string>
Inside the app
Change appName in lib/core/config/app_config.dart, and
the app_name value in each file in assets/lang/.
Web
Edit the <title> and the name in the top bar in
web/index.html, and name / short_name in
web/manifest.json.
2. Package name / bundle identifier
Every app published to the Play Store or App Store needs a unique identifier,
normally written as a reversed domain name such as
com.yourcompany.yourapp. The template ships as
com.wrteam.bicycart. You must change this before publishing.
Android
Open android/app/build.gradle.kts and change both
namespace and applicationId:
namespace = "com.yourcompany.yourapp"
...
applicationId = "com.yourcompany.yourapp"
Then move MainActivity.kt from
android/app/src/main/kotlin/com/wrteam/bicycart/ into a matching
folder path and update the package line at its top.
iOS
Open ios/Runner.xcworkspace in Xcode, select the Runner
target, open Signing & Capabilities, and set the Bundle Identifier.
Xcode updates the project file for you.
Store link
Rate Us and Share this app use storeUrl in
lib/core/config/app_config.dart. Point it at your own store listing.
3. Colours
All raw colours live in a single file:
lib/core/theme/app_palette.dart. Screens never hard-code a colour, so
changing the palette here updates every screen at once, in both themes.
The palette is organised as six colour families (primary, secondary, neutral,
error, success, warning). Each family is a scale of eleven steps, from
s00 (darkest) to s100 (lightest), defined once for light
mode and once for dark mode. The step names match the Figma file.
static const primaryLight = ColorScale(
  s00: Color(0xFF331F00),
  ...
  s50: Color(0xFFFF9A00),   // <- the BicyCart orange
  ...
  s100: Color(0xFFFFF4E3),
);
To rebrand the app, generate a scale in your own brand colour and replace
the values of primaryLight and primaryDark. Keep the step
names so nothing else needs to change.
Four related files complete the system:
app_colors_extension.dartmaps the palette onto roles such as text, surface, icon and border colours, picking different shades for light and dark.app_color_scheme.dartbuilds Flutter’s Material colour scheme from those roles.app_theme.dartbuilds the light and darkThemeData, including the default look of app bars, sheets, snackbars and spinners.app_spacing.dartholds the spacing scale, corner radii, icon sizes and animation durations.
4. Logo
The logo shown inside the app (on the splash screen) is a single SVG file:
assets/icons/logo_mark.svg.
- Export your logo from your design tool as an SVG. A square or near-square logo works best.
- Save it over
assets/icons/logo_mark.svg, keeping the same file name. (If you use a different name, updatelogoMarkinlib/core/constants/app_assets.dart.) - Stop the app and run it again. A hot reload does not always pick up changed assets.
The logos of the payment providers (PayPal, Stripe, Razorpay, UPI) and the Pay
Later partner are in assets/images/ and are referenced from the same
app_assets.dart file. Replace or remove them to match the providers you
actually use.
5. App icon
The project uses the flutter_launcher_icons package, which
generates every required icon size for Android and iOS from two source images.
- Replace
design/app_icon/icon.pngwith your own icon: a square PNG of 1024 × 1024 pixels. - Replace
design/app_icon/icon_foreground.pngwith the same artwork on a transparent background. Android uses it for its round and shaped icons. - Optionally change the background colour of the Android shaped icon in
pubspec.yaml. - Regenerate the icons.
The relevant block in pubspec.yaml:
flutter_launcher_icons:
  image_path: design/app_icon/icon.png
  android: true
  min_sdk_android: 21
  adaptive_icon_background: "#FFFFFF"
  adaptive_icon_foreground: design/app_icon/icon_foreground.png
  ios: true
  remove_alpha_ios: true
Then run:
flutter pub get
dart run flutter_launcher_icons
Web icons
Replace web/favicon.png (32 × 32), the four PNGs in
web/icons/ (192 and 512 pixels, plain and “maskable” with
padding) and web/icons/logo.svg, which is shown in the browser tab and
the preview’s top bar.
Phones and browsers cache icons. Uninstall the old build before installing a new one, and hard-refresh the browser (Ctrl + Shift + R) to see the change.
6. Splash screen
BicyCart has two splash layers. Both are worth updating.
The in-app splash (logo, name and tagline)
This is the orange screen with the logo that appears first. It is a normal
Flutter screen in lib/features/splash/screens/splash_screen.dart:
- Logo: uses
assets/icons/logo_mark.svg(see Logo). - Background colour: the brand colour from the palette, so it follows your colour change automatically.
- Name, tagline and footer: the
app_name,splash_taglineandsplash_footervalues in each file inassets/lang/. - How long it stays:
splashDurationinlib/core/config/app_config.dart.
The native launch screen (the first frame while the app loads)
Before Flutter starts, Android and iOS show a plain launch screen, white by default.
- Android: edit
android/app/src/main/res/drawable/launch_background.xmlanddrawable-v21/launch_background.xml. Change the colour, or uncomment the<bitmap>block and add your image to themipmapfolders. - iOS: open
ios/Runner.xcworkspacein Xcode, then editLaunchScreen.storyboardand theLaunchImageimage set inAssets.xcassets.
The free flutter_native_splash package generates the Android and iOS
launch screens from one image and colour. Add it as a dev dependency, configure it
in pubspec.yaml and run dart run flutter_native_splash:create.
7. Font
The app uses Public Sans, bundled in assets/fonts/ in five
weights, so text looks the same offline and nothing is downloaded at runtime. All
text sizes are defined in lib/core/theme/app_text_theme.dart using
Flutter’s Material text scale, from displayLarge down to
labelSmall.
Changing the font
- Put your font’s
.ttffiles inassets/fonts/. - Replace the Public Sans entries under
fonts:inpubspec.yamlwith your family name and files, one entry per weight. - Change the family name at the top of
app_text_theme.dart:static const fontFamily = 'Public Sans'; // <- your family name - Run
flutter pub getand restart the app (a hot reload does not pick up new fonts).
13 Light and Dark Mode
Both themes are fully designed. Users choose System, Light or
Dark in Settings, and the choice is saved and restored on the next
launch. The default is ThemeMode.system, which follows the device
setting.
The mode is held in lib/core/theme/app_theme_controller.dart. To
change it from your own code:
AppThemeController.setMode(ThemeMode.dark);To force one mode for every user, set the value in
AppThemeController.init() and remove the Appearance option from
features/profile/screens/settings_screen.dart.
14 Languages and RTL
BicyCart ships with English and Arabic. Translations are plain JSON files in
assets/lang/, loaded at startup and served through GetX. Users switch
language from Profile → Change Language, and the choice is saved.
| File | Language |
|---|---|
en.json | English |
ar.json | Arabic — right-to-left layout |
Every user-facing string is referenced by a key rather than written into the screen code, so translating the app means editing JSON only. Product names and descriptions are data, not keys, and come from your catalogue.
Editing existing text
Open the JSON file and change the value. Keys must stay identical across all language files.
{
  "add_to_cart": "Add to cart",
  "proceed_to_checkout": "Proceed To Checkout"
}
Adding a new language
- Copy
assets/lang/en.jsonto a new file named with your language code, for examplefr.json, and translate the values. Do not change the keys. - Open
lib/core/localization/app_language.dartand add the language:static const french = AppLanguage(code: 'fr', nativeName: 'Français'); - Add it to the
AppLanguages.alllist. - Restart the app. The language appears in the language picker automatically.
Add isRtl: true for RTL languages such as Hebrew or Urdu. Flutter
mirrors the whole layout, and every screen in this template has been built and
tested against the Arabic locale.
Adding new text in your own screens
Add a constant to lib/core/constants/app_strings.dart, add the
same key to every JSON file, and use it as
Text(AppStrings.yourKey.tr).
Removing a language
Remove its entry from AppLanguages.all and delete the matching
JSON file. Nothing else needs to change.
16 Reusable Widgets
lib/commons/widgets/ holds 53 shared widgets, all styled from the
theme and all working in both themes and both text directions. Import them all at
once with import 'package:bicycart/commons/widgets/widgets.dart';. A
few you will use in almost every new screen:
| Widget | Use it for |
|---|---|
AppScaffold | A page with the standard top bar, title, back button and optional bottom bar |
AppButton | .primary, .secondary, .tonal, .dark buttons with a loading state |
AppTextField | Text inputs, with .password and .search variants |
AppLoadState | Shows loading, error with Retry, empty or your content, from one widget |
AppEmptyState | Empty and error messages with an icon and an action |
AppCard | White rounded card (flat, outlined or raised) |
AppProductCard, AppProductGrid | Product tiles and responsive product grids |
AppBottomSheet | Modal sheets with the standard header |
AppStickyBar | The bar at the bottom of a screen holding its main action |
AppSnackbar | Short confirmation and error messages |
AppImage, AppIcon | Images (asset, SVG or picked photo) and tinted SVG icons |
17 Connecting a Real API
Screens never build or store their own data. Each one reads from a repository (or, for data shared across screens, a service), and every method is already asynchronous and returns typed models. Swapping the demo data for your server means changing method bodies only.
| Data | Where |
|---|---|
| Products, categories, collections, banners | core/data/catalog_repository.dart, features/home/repositories/ |
| Product details, reviews | features/product_details/repositories/, core/data/reviews_repository.dart |
| Login, OTP, Google sign-in, sign-up | features/auth/repositories/auth_repository.dart |
| Cart, wishlist, addresses, profile, notifications | core/data/*_service.dart |
| Checkout, payment methods, promo codes | features/checkout/repositories/ |
| Orders, cancel, reschedule, returns | core/data/orders_repository.dart |
| Offers, transactions, Pay Later, chat, info pages | features/<feature>/repositories/ |
Recommended approach
- Add an HTTP client to
pubspec.yaml, such ashttpordio, and runflutter pub get. - Open a repository, for example
catalog_repository.dart, and note the methods the screens call and the models they return. Shared models are inlib/core/data/models/. - Add a
fromJsonfactory to each model you receive, and atoJsonmethod to each model you send. - Replace each method body: remove the
Future.delayeddemo delay and call your endpoint instead. Keep the method names and return types. - Throw an exception when a request fails. Screens already show a loading spinner while waiting and an error message with a Retry button on failure, so they need no changes.
- When you are done, delete
core/data/catalog_demo_data.dartand any other demo lists the repositories no longer use.
Change one repository at a time and run the app after each. Because each repository is independent, the rest of the app keeps working on demo data while you migrate.
Images from your server
The demo data uses local asset paths. When your API returns image URLs, render
them with a network image widget such as Image.network or the
cached_network_image package in place of AppImage.
Payments, sign-in, voice search and chat
These are simulated in the template. See Third-Party Services Setup for where to get the keys and where to put them.
18 Firebase Authentication
AuthRepository is shaped so Firebase Authentication drops in without
changing any screen:
sendOtp(phoneNumber:)receives the number in international format (for example+911234567890) and returns a verification id, which the app passes toverifyOtp(verificationId:, code:), including after Resend. This matches Firebase’sverifyPhoneNumberflow.signInWithGoogle()maps to Google sign-in.- For errors the user can act on, throw
AuthException(AuthFailure.…). The screen shows a translated message and re-enables the button. Any other exception shows a generic error.
// Map Firebase error codes to the template's failures:
on FirebaseAuthException catch (e) {
  throw AuthException(switch (e.code) {
    'wrong-password' || 'invalid-credential' => AuthFailure.invalidCredentials,
    'invalid-verification-code' => AuthFailure.invalidCode,
    'too-many-requests' => AuthFailure.tooManyRequests,
    'network-request-failed' => AuthFailure.network,
    _ => AuthFailure.unknown,
  });
}The login screen asks for a phone number and a password. Firebase signs users in with a phone number and a one-time code, or with an email and a password. To use Firebase, either switch the login form to email and password, or sign users in with an OTP.
After a successful sign-in the app records the session with
SessionService.start(SessionType.member). If your API needs a token,
store it in secure storage alongside it.
19 Third-Party Services Setup
BicyCart runs without any API keys. The services below are simulated with demo data so every screen works out of the box. To make them work for real, create an account with the provider, get your keys, and replace the demo code in the file listed for each one.
These services are not included with the template. They need your own accounts and API keys, and most of them charge usage fees that are billed to you by the provider. Never put secret keys (for example a Stripe secret key) inside the app: keep them on your server and let the app call your server.
| Feature | Status in the template | Where to connect it |
|---|---|---|
| Phone login and OTP | Simulated: any number, password and code are accepted | features/auth/repositories/auth_repository.dart |
| Google sign-in | Simulated: the button signs you in as the demo customer | AuthRepository.signInWithGoogle() |
| Payments | Simulated: every payment succeeds | OrdersRepository.placeOrders() and payOrder() in core/data/orders_repository.dart |
| Voice search | Simulated with sample phrases | core/data/voice_search_service.dart |
| Support chat | Simulated: an agent replies automatically | features/support/repositories/chat_repository.dart |
| Rate Us / Share this app | Works; opens the store link | storeUrl in core/config/app_config.dart |
Firebase (phone OTP login)
- Create a project at
console.firebase.google.comand enable Authentication → Sign-in method → Phone. - Install the FlutterFire CLI and connect the app; it creates
lib/firebase_options.dart,android/app/google-services.jsonandios/Runner/GoogleService-Info.plistfor you:dart pub global activate flutterfire_cli flutterfire configure - Add the packages:
flutter pub add firebase_core firebase_auth. - Call
Firebase.initializeApp()at the start ofmain()inlib/main.dart. - Replace the bodies of
sendOtpandverifyOtpinauth_repository.dart, as described in Firebase Authentication. - For Android, add your app’s SHA-1 and SHA-256 fingerprints in the Firebase
project settings (run
cd androidthen./gradlew signingReportto see them).
Google sign-in
- In the same Firebase project, enable Google under Sign-in method. This creates the OAuth client IDs in Google Cloud for you.
- Download the updated
google-services.jsonandGoogleService-Info.plist(or runflutterfire configureagain). - On iOS, add the
REVERSED_CLIENT_IDfromGoogleService-Info.plistas a URL scheme in Xcode (Runner → Info → URL Types). - Add the
google_sign_inpackage and implementsignInWithGoogle()inauth_repository.dart.
Payment gateways (Stripe, Razorpay, PayPal, UPI)
- Create a merchant account with your provider and copy the keys from its
dashboard: Stripe at
dashboard.stripe.com/apikeys, Razorpay atdashboard.razorpay.com(Settings → API Keys), PayPal atdeveloper.paypal.com(Apps & Credentials). - Keep the secret key on your server. Your server creates the payment (for example a Stripe PaymentIntent or a Razorpay order) and returns a client token to the app.
- Put the publishable / public key in the app, for example as a constant in
lib/core/config/app_config.dart. - Add the provider’s Flutter package (for example
flutter_stripeorrazorpay_flutter) and open its payment sheet fromplaceOrders()/payOrder()incore/data/orders_repository.dart. The payment screen (features/checkout/screens/payment_screen.dart) already shows a loading state and an error message, so it needs no changes. - Remove the payment options you do not offer from
lib/core/data/models/payment_method.dart.
Voice search
Voice search does not use the microphone in the template. After a short pause it returns one of four sample phrases (“Mountain bike”, “Cargo”, “Kids cycle”, “Vortex”) in turn, so the search flow can be shown without permissions or keys.
- Add a speech recognition package:
flutter pub add speech_to_text. It uses the phone’s built-in speech recognition, so no API key is needed; some platforms send audio to the OS vendor’s cloud service. - Replace
listen()inlib/core/data/voice_search_service.dartwith the package’s listen call, returning the recognised text. - Add the microphone permissions:
RECORD_AUDIOinandroid/app/src/main/AndroidManifest.xml, andNSMicrophoneUsageDescriptionplusNSSpeechRecognitionUsageDescriptioninios/Runner/Info.plist. - To use a cloud service instead (for example Google Cloud Speech-to-Text), get
an API key from
console.cloud.google.com, call it from your server, and return the text fromlisten().
Support chat
Replace send() in
features/support/repositories/chat_repository.dart with your chat
service (for example Firebase Cloud Firestore, your own WebSocket server, or a
provider such as Intercom or Tawk.to). It receives the customer’s message, with
any attached photo or file, and returns the agent’s reply.
20 Permissions
The only feature that needs a device permission is attaching a photo or file in Chat With Us, which opens the camera, the photo gallery or the file manager.
| Platform | What is set up |
|---|---|
| iOS | NSCameraUsageDescription and NSPhotoLibraryUsageDescription in ios/Runner/Info.plist. Edit the messages to suit your app; Apple shows them in the permission prompt. |
| Android | Only INTERNET. The system pickers used by the app need no extra permission. |
| Web | The browser asks for camera access when needed; files are chosen through the normal file dialog. |
If you remove the attachment feature, also remove the two iOS usage descriptions. Apple rejects apps that declare permissions they do not use.
21 Building for Release
Android
flutter build apk --release                  # one APK for all phones
flutter build apk --release --split-per-abi  # smaller APK per phone type
flutter build appbundle --release            # .aab for the Play Store
APKs are written to build/app/outputs/flutter-apk/ and the bundle to
build/app/outputs/bundle/release/. Most phones use the
arm64-v8a APK.
Signing for the Play Store
Without your own key, release builds are signed with a debug key. That is fine for sharing test APKs, but the Play Store rejects them. Create an upload key once:
keytool -genkey -v -keystore upload-keystore.jks -keyalg RSA -keysize 2048 -validity 10000 -alias uploadThen create android/key.properties:
storePassword=your-store-password
keyPassword=your-key-password
keyAlias=upload
storeFile=/absolute/path/to/upload-keystore.jks
The build picks it up automatically. Both files are already excluded from version
control in android/.gitignore.
Keep the .jks file and its passwords somewhere safe. Without them
you cannot publish updates to your app.
iOS
flutter build ios --releaseThen open ios/Runner.xcworkspace in Xcode, set your team and signing
certificate under Signing & Capabilities, and archive for distribution. A paid
Apple Developer account is required to publish.
Pre-release checklist
- Change the app name and app icon.
- Change the package name and bundle ID, and the store link in
AppConfig. - Set up release signing for Android.
- Update
version:inpubspec.yaml(andappVersion) for every store upload. - Replace the sample products, images and text with your own content.
- Connect your backend, payment gateway and sign-in provider.
- Test in light and dark mode, and in every language you ship.
- Run
flutter analyzeandflutter testand confirm both pass.
22 Web Version and Hosting
The same project builds for the web. On a desktop browser the app is shown
inside a phone or tablet frame, with a device picker in the top bar (current
iPhone, iPad, Pixel and Galaxy models). On a phone-sized window it runs full screen.
The frame is web-only and never appears in your Android or iOS builds; its code
lives in web/ and lib/web_preview/.
flutter build web --releaseThe output in build/web/ is a static site you can upload to any
host.
Free hosting on Firebase
- Install the Firebase CLI and sign in:
npm install -g firebase-tools firebase login - Create a project at
console.firebase.google.com. - In the project folder, run
firebase init hostingand answer: public directorybuild/web, single-page app Yes, automatic GitHub builds No, overwriteindex.htmlNo. - Build and deploy:
flutter build web --release
firebase deploy --only hosting
The deploy prints your https://<project>.web.app link. Netlify,
Vercel and GitHub Pages work too: upload the build/web folder (for
GitHub Pages, build with --base-href /<repo-name>/).
23 Code Quality and Tests
The project uses the strict very_good_analysis lint rules and ships
with zero analyzer warnings. It also includes 126 widget tests that walk through
the main journeys (sign-in, cart, checkout, orders, returns, profile, search) and
render the screens in dark mode, in Arabic, with large text and on a narrow
phone. Any layout overflow fails a test.
flutter analyze   # should report: No issues found!
flutter test      # should report: All tests passed!
Run both after each change you make. They catch broken layouts and missing translations long before your users do.
24 Troubleshooting
| Problem | Solution |
|---|---|
Version solving failed, or an SDK version error on first pub get | Your Flutter SDK is older than the template requires. Run flutter upgrade and confirm with flutter --version. |
| Build fails after upgrading Flutter or changing packages | Run flutter clean followed by flutter pub get, then build again. |
flutter run -d chrome opens Chrome but never connects | Some Chrome versions do not hand Flutter the debugging connection. Run flutter run -d web-server --web-port 8080 and open http://localhost:8080 yourself. |
pod install fails on macOS | Run pod repo update and retry. If it still fails, delete ios/Podfile.lock and the ios/Pods folder, then run pod install again. |
| Gradle build fails with a Java version error | The Android build requires JDK 17. Check which JDK Android Studio uses under Settings → Build Tools → Gradle. |
| The Play Store rejects the upload as debug-signed | Create android/key.properties as described in Building for Release, then build again. |
| The new app icon does not appear | Run dart run flutter_launcher_icons, uninstall the old app from the device, then install again. |
A translated string shows as its key, such as add_to_cart | That key is missing from the language file. Add it, keeping the key identical to the one in en.json. |
| A new font does not show | Check the family name in pubspec.yaml matches AppTextTheme.fontFamily, then fully restart the app. |
25 Credits and Licences
BicyCart is built on the following open-source packages, each used under its own licence:
| Package | Used for |
|---|---|
get | Routing and translations |
shared_preferences | Saving theme, language and session |
flutter_svg | Rendering the SVG icons and illustrations |
image_picker, file_picker | Chat attachments from the camera, gallery and file manager |
share_plus | Sharing products, invoices and the app |
url_launcher | Opening the store listing |
device_preview | The device frame in the web version |
flutter_launcher_icons | Generating launcher icons (development only) |
very_good_analysis | Lint rules (development only) |
The Public Sans typeface is licensed under the SIL Open Font License; the
licence is included at assets/fonts/OFL.txt.
Use of AI tools: AI-assisted tools were used during development of this item, to help write and review parts of the code and this documentation. All of it was reviewed, tested and finalised by our team. The template has no AI-powered features and sends no data to any AI service.
Images and icons in this package are licensed for use within apps built from this template. They may not be resold on their own or as part of another template.
26 Changelog
Version 1.0.0
- Initial release.
27 Support
Item support is provided in line with the CodeCanyon item support policy. Support covers:
- Responding to questions about how the template works.
- Answering questions about features documented here.
- Help with defects in the template itself.
- Bug fixes and template updates.
Support does not cover customisation work, installation on your behalf, or integration with third-party services and backends. If you need any of that, get in touch and we can discuss it separately.
To request support, use the support tab on the item page on CodeCanyon. Please
include your Flutter version (flutter --version), the platform you are
building for, and the full error output where relevant; it lets us help you far
more quickly.
Live chat support
Alongside the item support tab, we offer direct chat support over Microsoft Teams if you would prefer to talk something through.
Chat support is offered as a convenience in addition to, not in place of, CodeCanyon’s own item support. Response times outside the item support channel are best-effort.
We hope it saves you a lot of time. A rating on the item page is genuinely appreciated.